


An Obsession Demonstration
(How to make animations out of receipts)

Dear friend,
This week’s letter is a long one. The TLDR is that a ton of work goes into something that appears simple on the surface. You know my mantra, “the more you look, the more you see.” There’s often obsession hiding behind uncommon quality. So just warning you, this one goes deep into the weeds…
The reason for this tutorial is that my receipt animations continue to strike a chord with people. At least on Instagram. Not so much with the TikTok or YouTube for some reason. Anyway, this newsletter has gotten a surge of new subscribers from Instagram so I suspect there might be interest in the nitty-gritty behind-the-scenes details of how I make animations printed on receipts. But if that’s not you, don’t feel obligated to read this whole thing. Maybe just enjoy this picture and call it a day.
…
Are you still here? Awesome. Here’s everything you need to know if you want to undertake the odd hobby of creating animations on receipts. Let’s go…
Part 1: Image Preparation
Picking the video you want to use is the first hard decision. It’s going to be an investment in time so you want to make sure you like the subject matter. You don’t want to get to the end of the process and wish you had picked something else.
I like to browse archive.org for old copyright-free videos. When I am looking for images, I am looking for something I can loop. That way there is no beginning or end. The animation can play indefinitely without any stops, starts, or gaps. But you could do it at any length of video if you have the patience to grind through that many frames.
Once I find the video it is a matter of breaking it into frames. Video tends to be at 30 frames per second but you probably don’t want to use every frame. I’ve been doing my animations at 7-15 frames per second because that allows each receipt to be visible long enough for it to be recognized.
Here’s our first challenge. How do you take a 30fps video and convert it to an arbitrary frame rate like 9fps? I’m glad you asked. My method is to open a video in photoshop using file/import/video frames to layers. This gives you options to identify a section of the video you want and lets you skip frames so you can reduce the frame rate.

Now you have each frame as a layer. I try to reduce the amount of frames to between 15-20 so that I can keep the process manageable because every frame is going to require lots of work.
I use Photoshop’s animation panel which lets me play the animation as I am working. You want to “Create a Frame Animation” not “Create Video Timeline” in the animation panel. It looks like this:

If there is any misalignment of the images from frame to frame, I make adjustments to the position on the corresponding layer. Since I am interested in a loop, I focus on the transition from the last frame to the first. Let’s say that I want to loop a bird but in the course of it’s wing flapping it has moved a bit from the right to the left? How would I line this up so it doesn’t jump? There is no easy way other than to re-align all 15 frames manually. It’s tedious.
Once I have the frames ready I could export each frame as a jpg. This would be ok, but to optimize for the low resolution of the printer I need an extra step. We need to understand something called “dithering.”
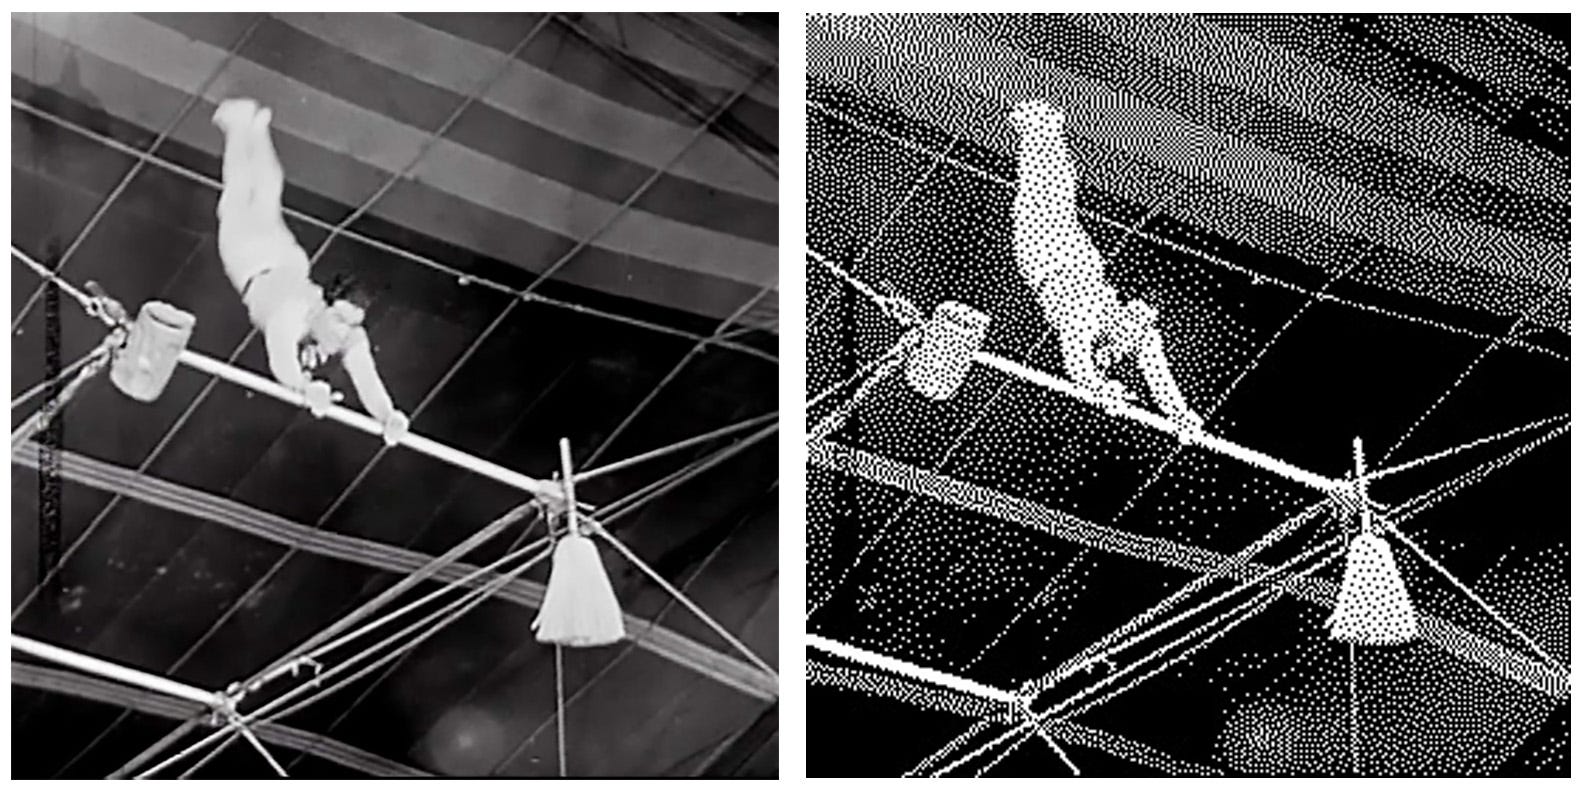
Dithering, put simply, converts the image to dots more like stippling than typical grayscale images. Why is dithering necessary? Because a receipt printer is black and white. Not grayscale. In other words, a pixel is either black or white. Not gray. So you have to “fake” the gray values with dots.
To create a dithered image with Photoshop you save a gif by going to “file/export/save for web legacy.” This is the panel where you can adjust the dithering settings and export a gif.

Great, now you have a dithered gif that you can use to print on receipts. So let’s shift gears and talk about how to prepare your receipt roll and printer…
Part 2: Receipt Roll Preparation
The goal is to have a roll of receipt paper made entirely of pre-used receipts. How do we do that? I tape each receipt end-to-end using strips cut from shipping labels. The reason I don’t use scotch tape is that I want to be able to print on the “taped” areas. Shipping labels are thermal paper, just like receipts. And they have adhesive backs which let’s me use them like tape.

I tape the bottom and top so that nothing can catch on the printer and stop the presses. The tape extends past the edges, so I trim them with scissors after they are connected. Once I have a long strip I roll it up.

When rolling the receipts I try to keep the roll tight. If it gets too loose then the width of the roll will be a bit wider than the printer and it will bind up. The “bottom” of the receipt should be on the inside of the roll otherwise your receipts will be upside down when they are printed. Once the receipts are wound up, I place it in the printer.
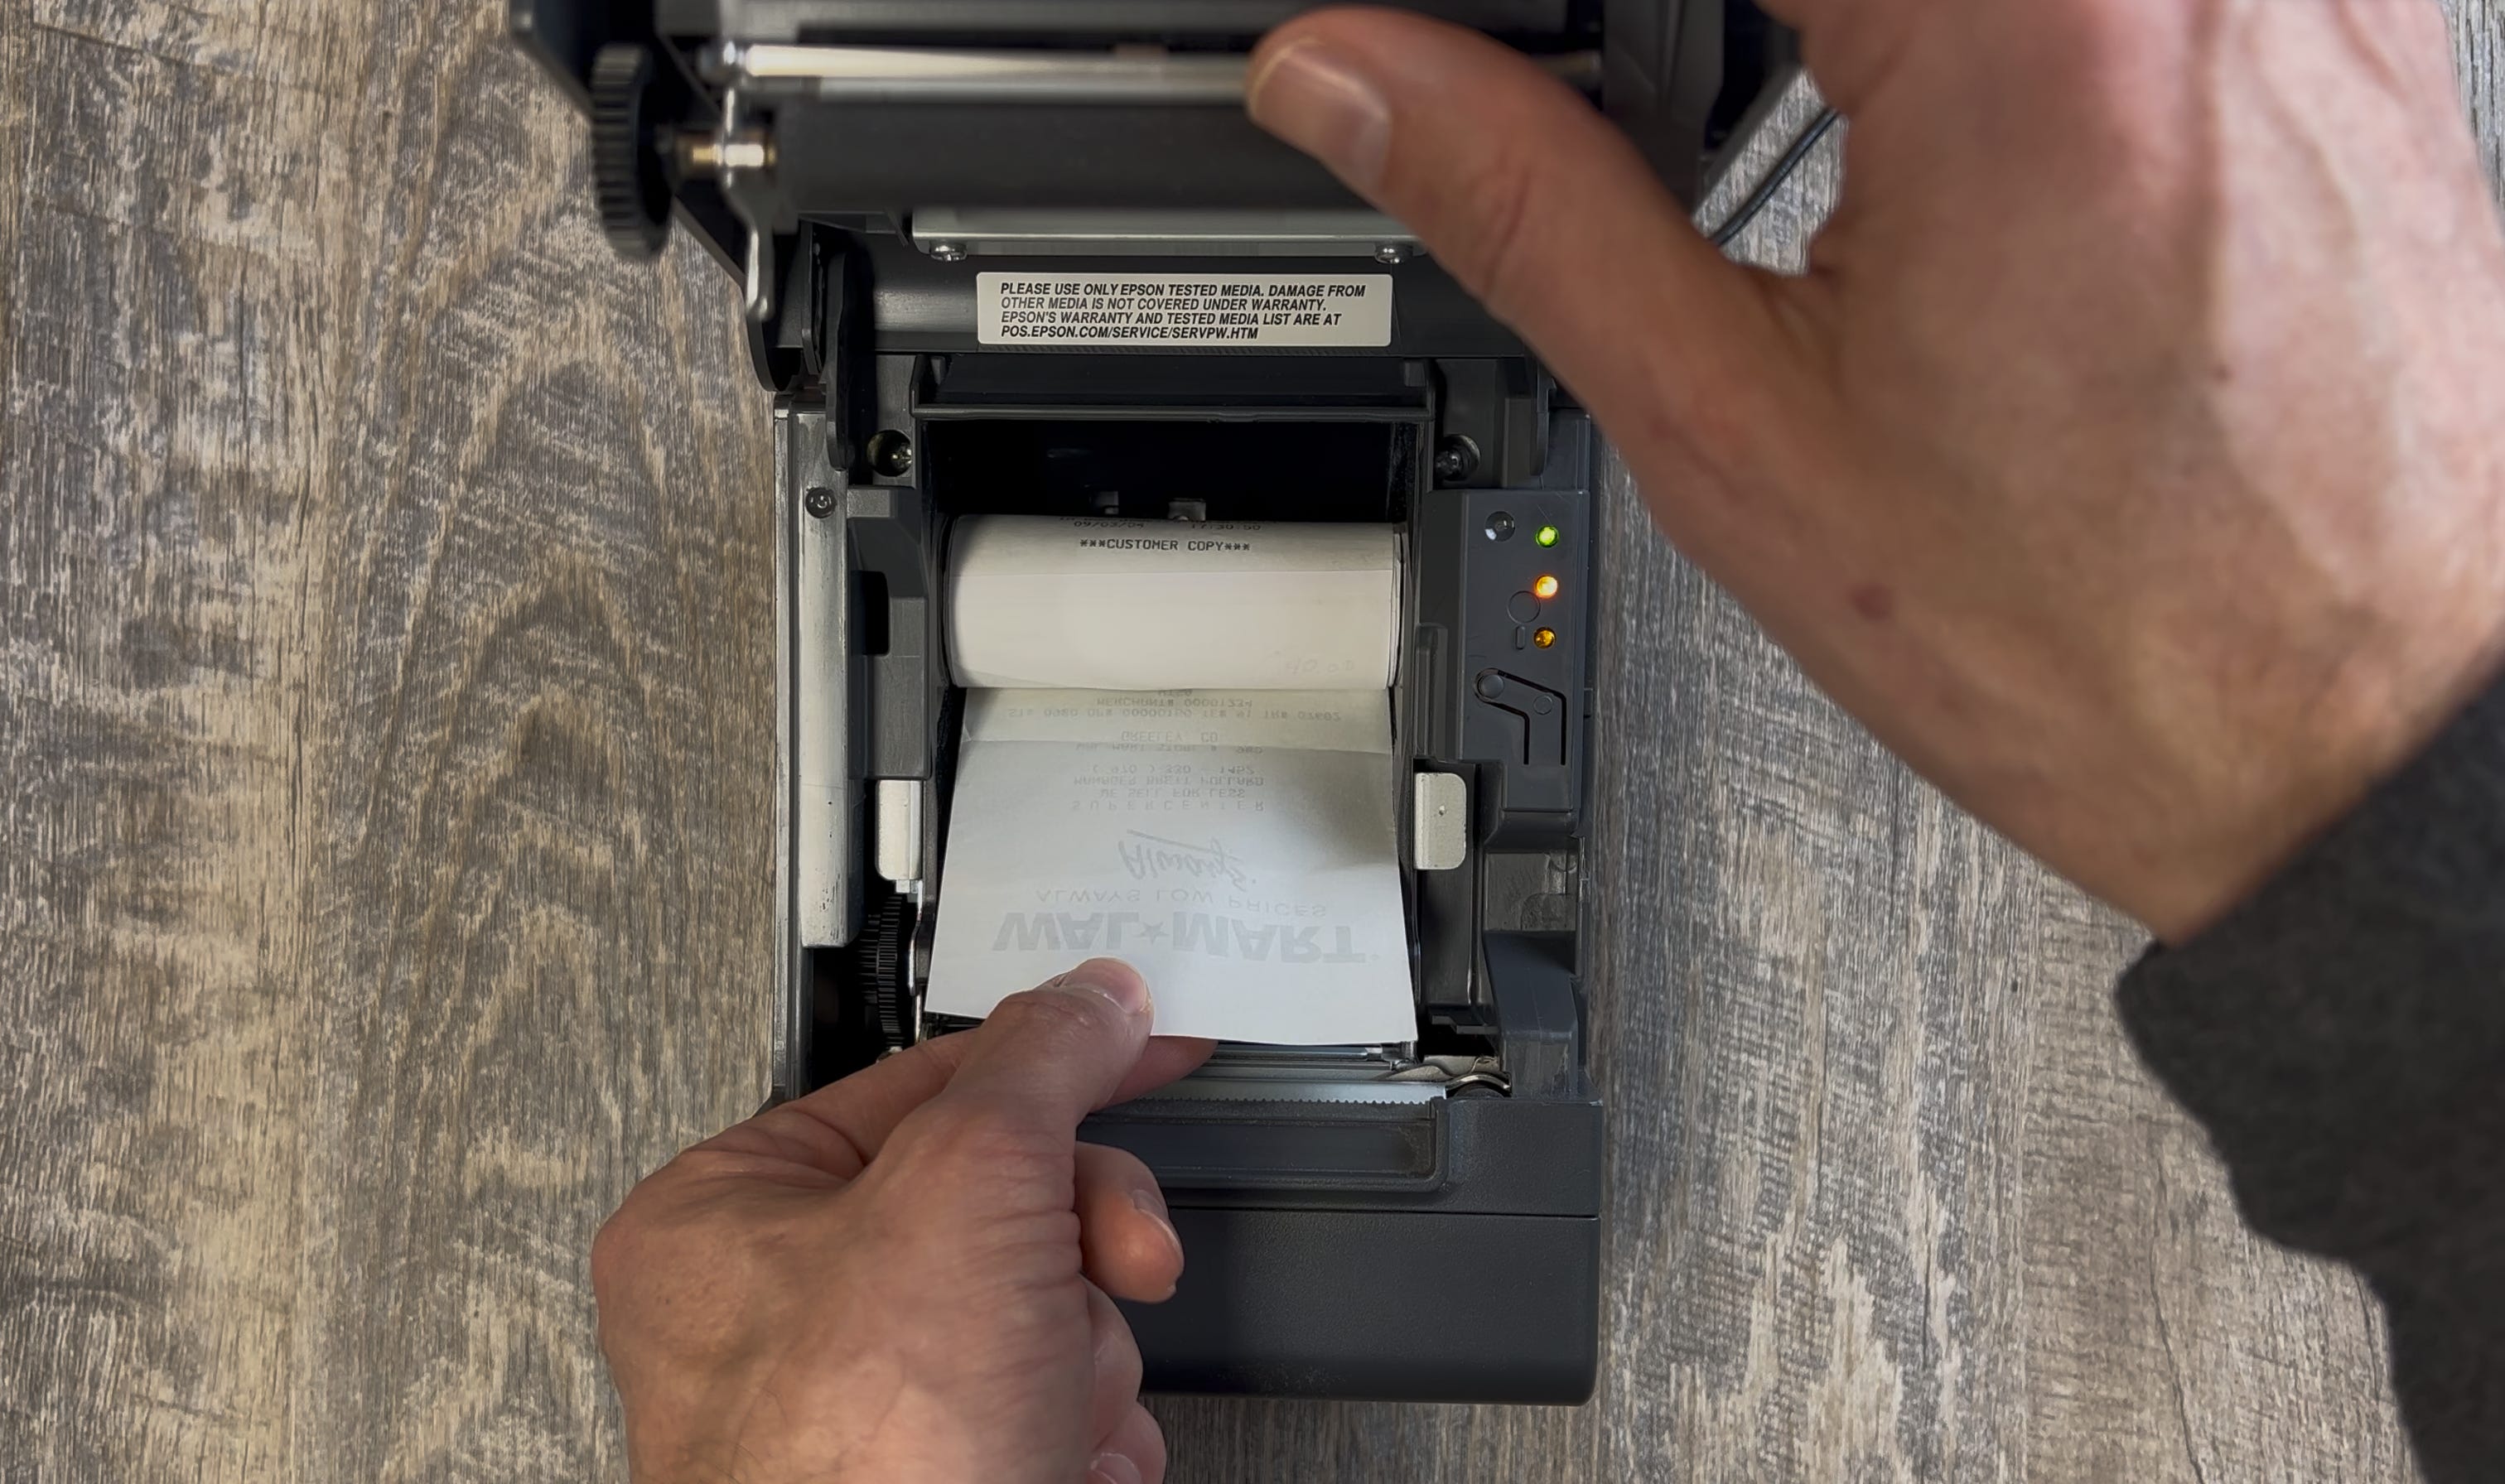
Now it is time to print. Nothing fancy here, I use Preview which allows me to open the gif and print each frame in order. The printer I am using is an Epson TM-T20II. You could use other printers, I only chose this one because it had drivers that work with the Mac and I assumed Epson would keep their software up to date. It shows up as an ordinary printer with they typical print dialog boxes. I created a custom paper size of 2.83x3.25 which gives me a sufficient gap between images.

I want to print all the images on one big long strip (not cut between frames). By printing “all pages” at once the printer only makes a cut after the job is done. If you wanted to let the printer do the cutting you could print the frames one at a time. The reason I do a single strip is that I am going to cut them later anyway and keeping them together makes it easier to keep the frames in order.

I print four times as many images than I need. That allows me to pick the “good ones” and get rid of the bad ones. I want the receipts to loop twice. So if the animation is 15 frames, I print 60 images. Half are discarded and then I have 30 left which represent the loop playing twice.
Part 3: Assembling the Final Animation
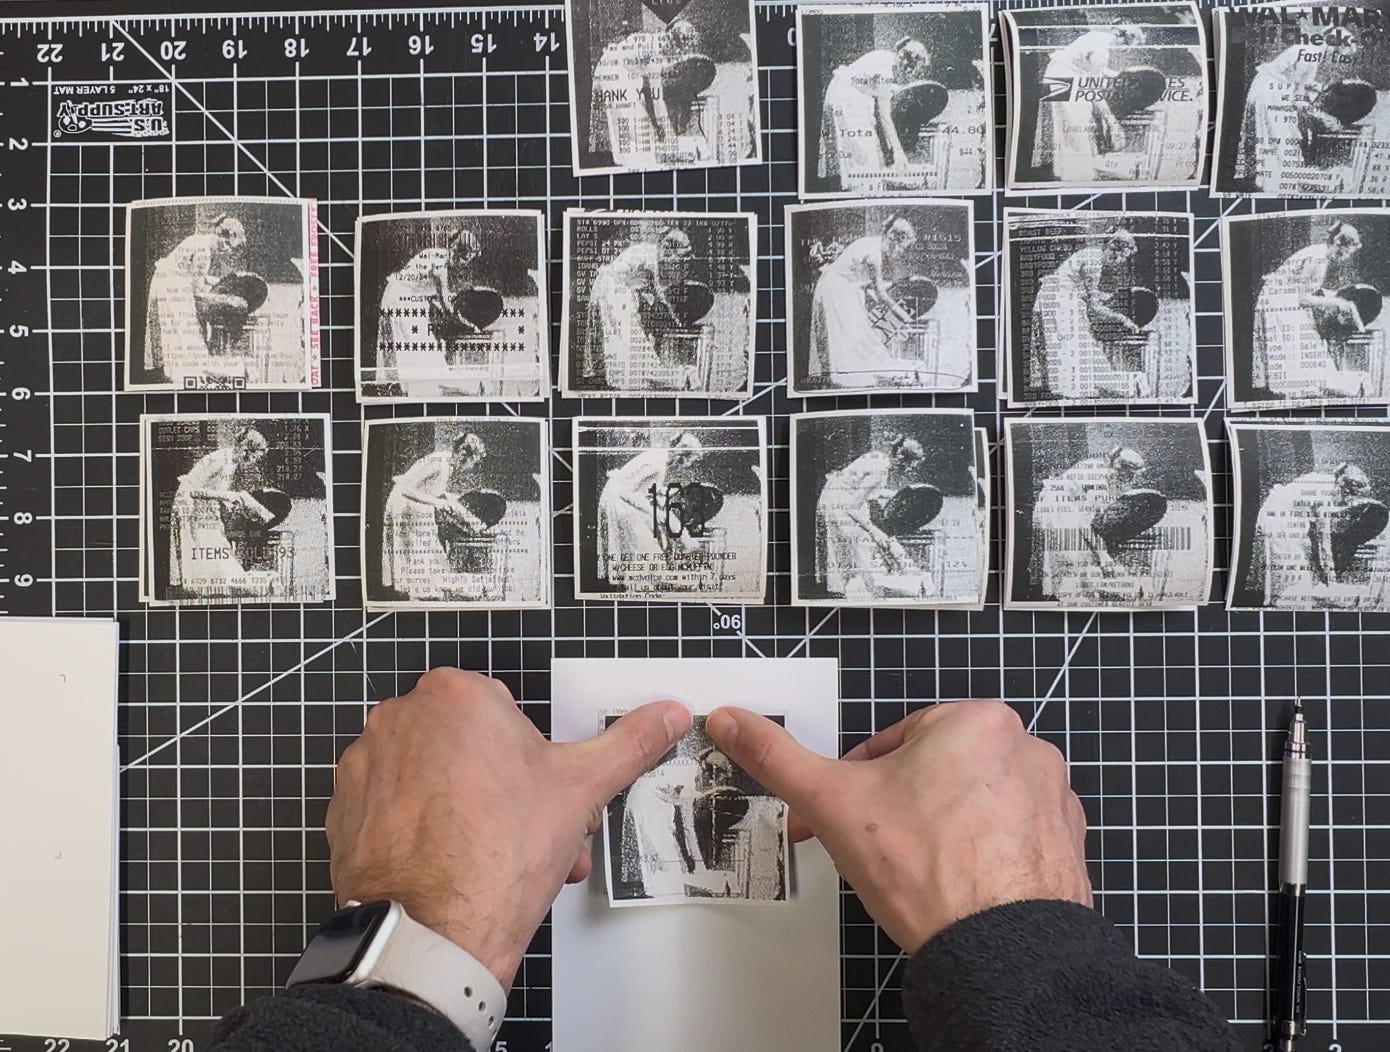
Now I have the receipts printed with the animation frames. I need to mount them so that I can scan them back into the computer. I used to use spray adhesive to mount the prints but now I am using double sided tape sheets. Take a piece of double sided tape sheet cut a bit bigger than the receipt (about 3.5x3.5in). Put the receipt on it, then cut the receipt down so you have clean edges. You basically have a receipt sticker now. I attach it to 4x6 cards and number one to make it easier to keep the frames in order. Then I sign and title each print.

It’s important to stay organized because if you get the prints out of order it will be a headache to figure out what frame is which if they get mixed up. I place the frames in order on my desk as seen below so that it is clear what to do next.
Next I scan each receipt at high resolution. I put each scan in Photoshop as a separate layer. I color correct each frame. I also position each frame so that they line up. This involves skewing each frame a tiny bit because the printing process isn’t perfect so each corner needs to be pulled so that the frames line up perfectly. I use the timeline I described above to preview the animation.
Part 4: Exporting a High Resolution Video
Finally, we have our receipt art ready to be saved in its final video form. How do we get the highest quality video?
You might be tempted to export a gif since we used the frame animation tool. This would work but the quality would be too low. That’s because gif’s have a maximum of 256 colors. That small palette is shared across all 30 frames. As a result you are going to get patchy colors.
I want high resolution jpgs for each frame so I export each frame one at a time. I end up with a folder with a jpg for each frame. These are basically my “master” files that I also use for printing if I want digital prints later on. But these images are too large for video. I duplicate the folder of images so that I can resize them to 1920x1080. With the duplicated images I create an action that sizes the image down to 1080x1080 pixels, extends the canvas to 1920 height (targeting portrait). Then I batch the folder with the action. You could do this manually if you don’t know how Photoshop actions work, but it is a nice time saver.
Now we have a folder of images sized to the exact dimensions we need. How do we assemble this series of images into a video? One way is to use Quicktime because it has an “open image sequence” option. As long as the images are named “image1, image2, etc” it will build a video with the frames in the right order. Once you have the video in Quicktime you can save it, but be sure to save it at the highest quality because compression really kills the effect, making everything blurry.
A better alternative to Quicktime is iMovie which lets me control the timing of the frames better. I bring each jpg into the iMovie timeline and adjust the timing of each frame to be 0.1-0.2 seconds. Then I export the loop at the highest quality. I bring that video back into iMovie and copy/paste it to make the loop play for as long as I need it. Export again and I’m done.
If you decide to try this project I’d love to see what you come up with. Stay creative.
Your friend,
Ade
P.S. Since you made it to the end of this long email can I send you a print? Enter your mailing address (US only) at x.adrian3.com and I‘ll drop some art in the mail.
this is brill. i'm a musician & am keen to make something as a visualiser for one of my songs -- will have to give this a go...
Your process itself is beautiful! Thank you for so generously sharing how you do what you do. The result is also astonishingly beautiful. 🤩