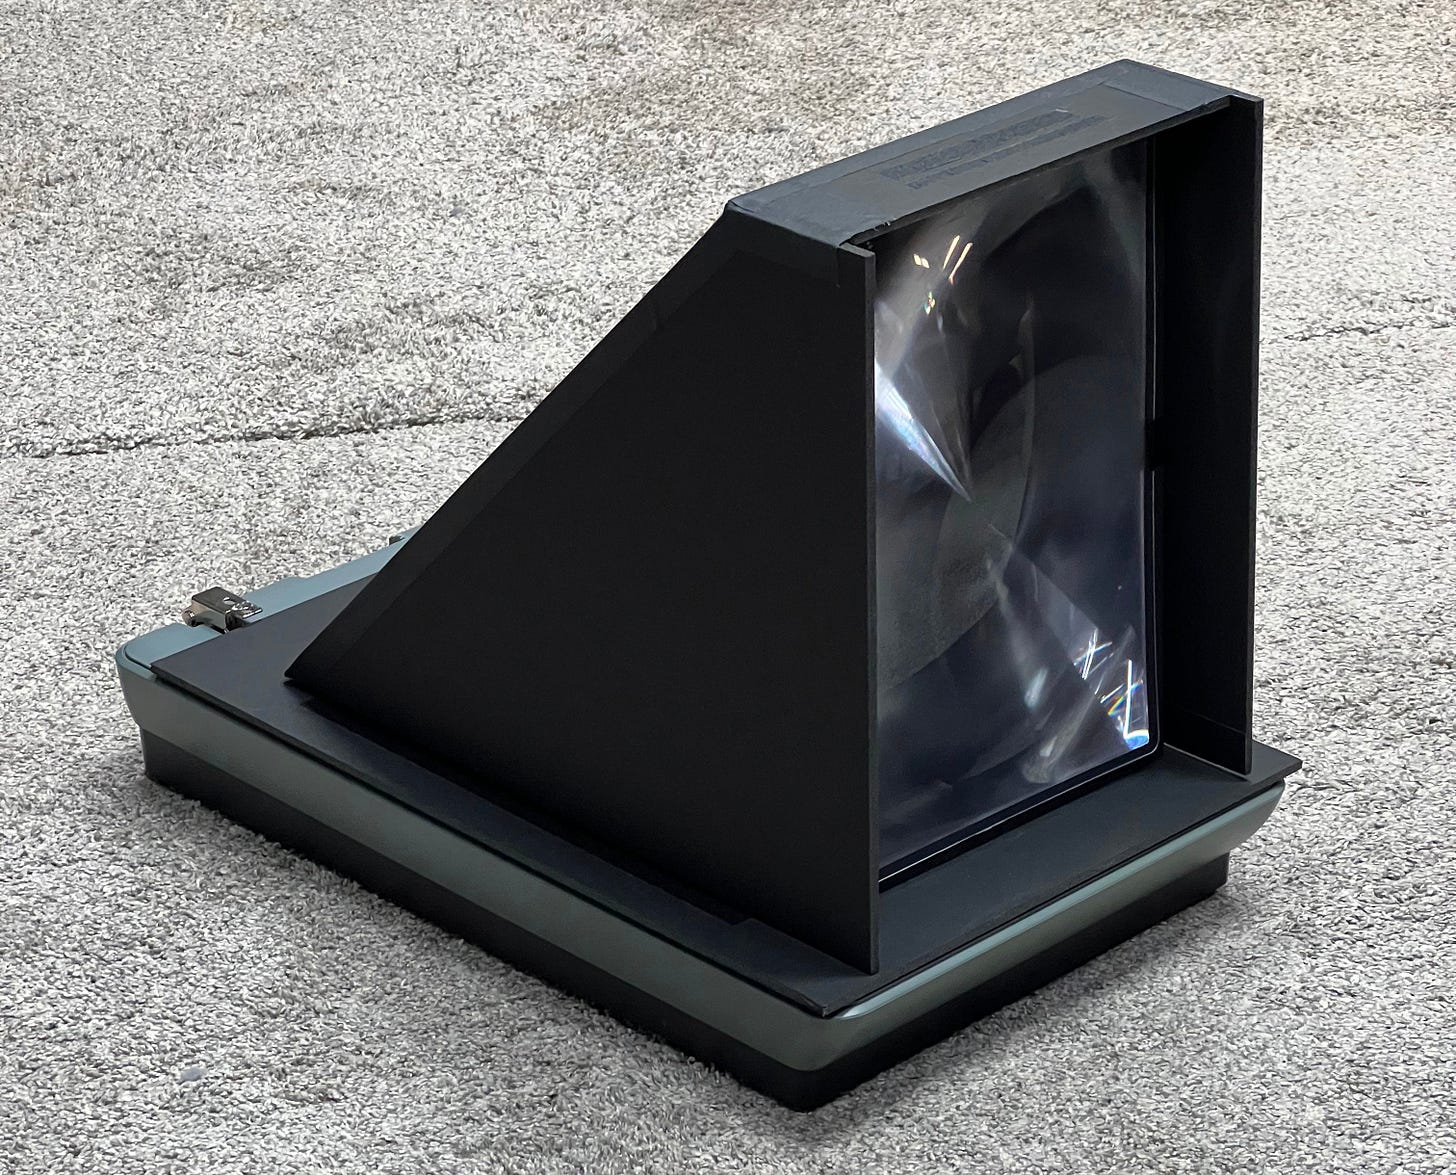
This is the story behind my latest camera project. I used an old flatbed scanner and a cheap $10 magnifier (fresnel lens) to create a makeshift large format digital camera. While it’s not as big as my coffee stirrer camera or my hologram camera, it’s still pretty big.
Why turn a scanner into a camera? This camera concept has a couple of interesting aspects. First is the the moving sensor. Unlike a normal camera that captures all the pixels at once, a scanner takes several seconds to move from one side to the other. This delay introduces some interesting distortion and creative possibilities. It’s kind of a poor man’s slit scan camera in this regard.
The second interesting part is the fresnel lens. It’s sold as a magnifying glass that costs about $8. Yes, it is cheap. Yes, it is plastic. What could be dismissed as flaws, are also unique characteristics that you won’t get from normal lenses.
The other interesting aspect is the potential to create very high resolution images. A scanner like this can scan at 4800 pixels per inch. Multiply that by the size of the glass (8x12) and you are talking major megapixels. But before you get too excited remember that these megapixels are capturing an image from a plastic magnifying glass. At a certain point it stops making sense to get a higher resolution picture when the lens isn’t providing you additional detail. Still, the high resolution is part of the equation that makes a scanner camera interesting.
What follows is not exactly a tutorial. If you undertake this project your design will vary depending on the scanner you have at your disposal and your ingenuity with how you assemble your box. But I’ll try to provide the conceptual framework that will help you find your way.
I’m not the first to undertake this project but there are some things that I’ve done differently so I want to publish my method to help anyone else who falls down this rabbit hole. I am going to document several failed prototypes before I get to the camera that actually worked.
Prototype 1
First, let me back up and explain the concept. A scanner is designed to capture an image pressed agains the glass. In other words, the focus point of the scanner is very close to the sensor. In order to take pictures we need the focus to be further from the glass. That’s where the fresnel lens comes into play. It has a couple benefits. First, it is flat, thin, and light unlike the oblong glass lenses we typically think of. It’s made of plastic so it is cheap. But most importantly, it projects light in an (almost) straight line. This straight projection of light means that it lets us “project” an image onto the focus plain of the scanner. It’s a bit more complicated than that but that’s the general idea.
The scanner I had was an HP Scanjet G4050. If you undertake this project I wouldn’t spend too much money on the scanner, you can probably find someone giving them away if you keep your eyes and ears open. They are basically obsolete nowadays.
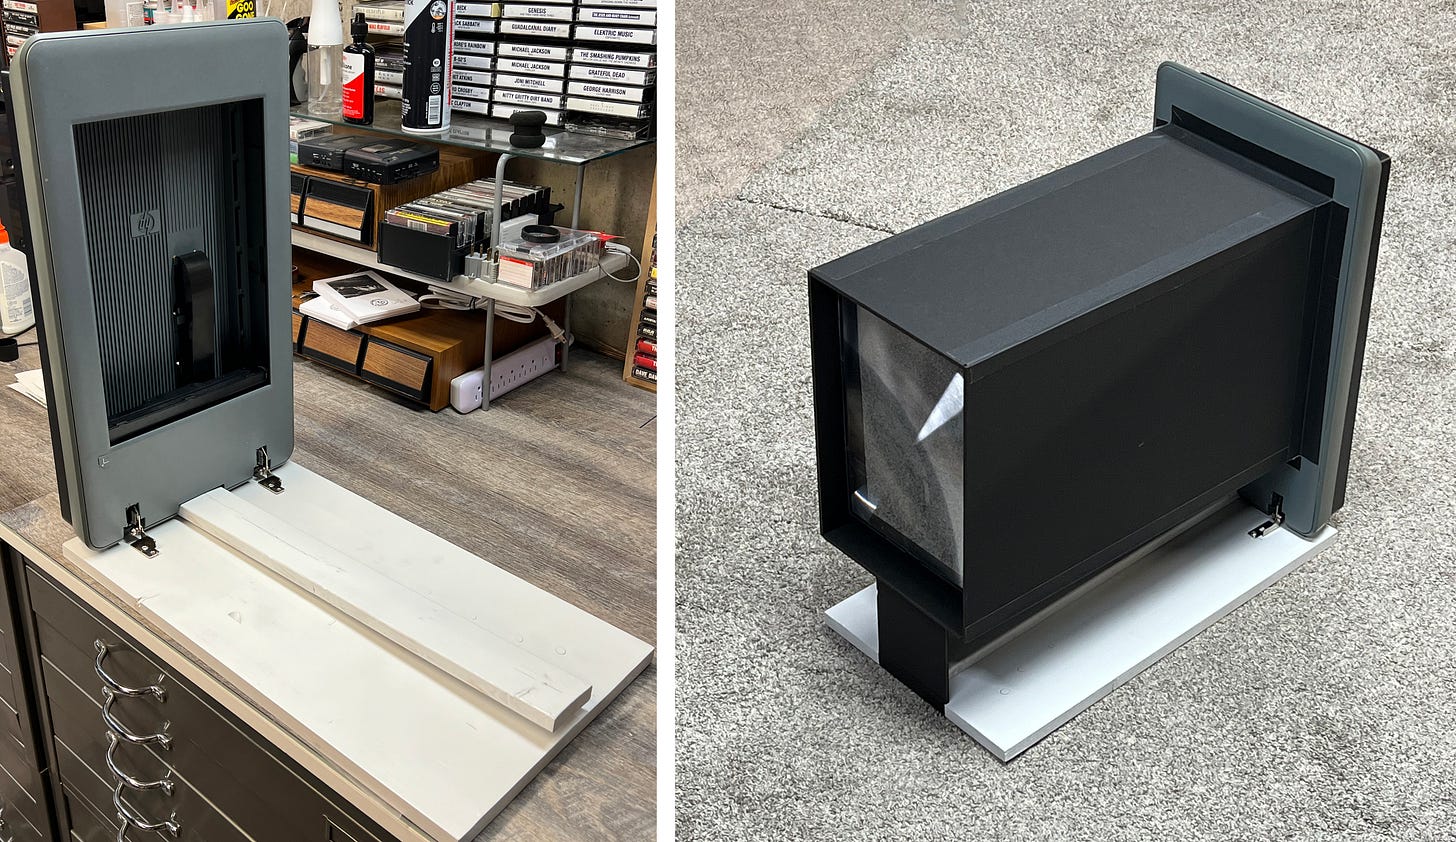
My method for prototyping is basically just black foam core, an x-acto knife, and gaffer tape. I measure, tape, and build as I go. Most of the time spent on my first prototype was trying to figure out how to put the camera on its side. After all, what good is a camera that only points at the ceiling? Foam core isn’t strong enough for this so instead I used a piece of wood as the base and then mounted the scanner to it using the hinges from the scanner cover.
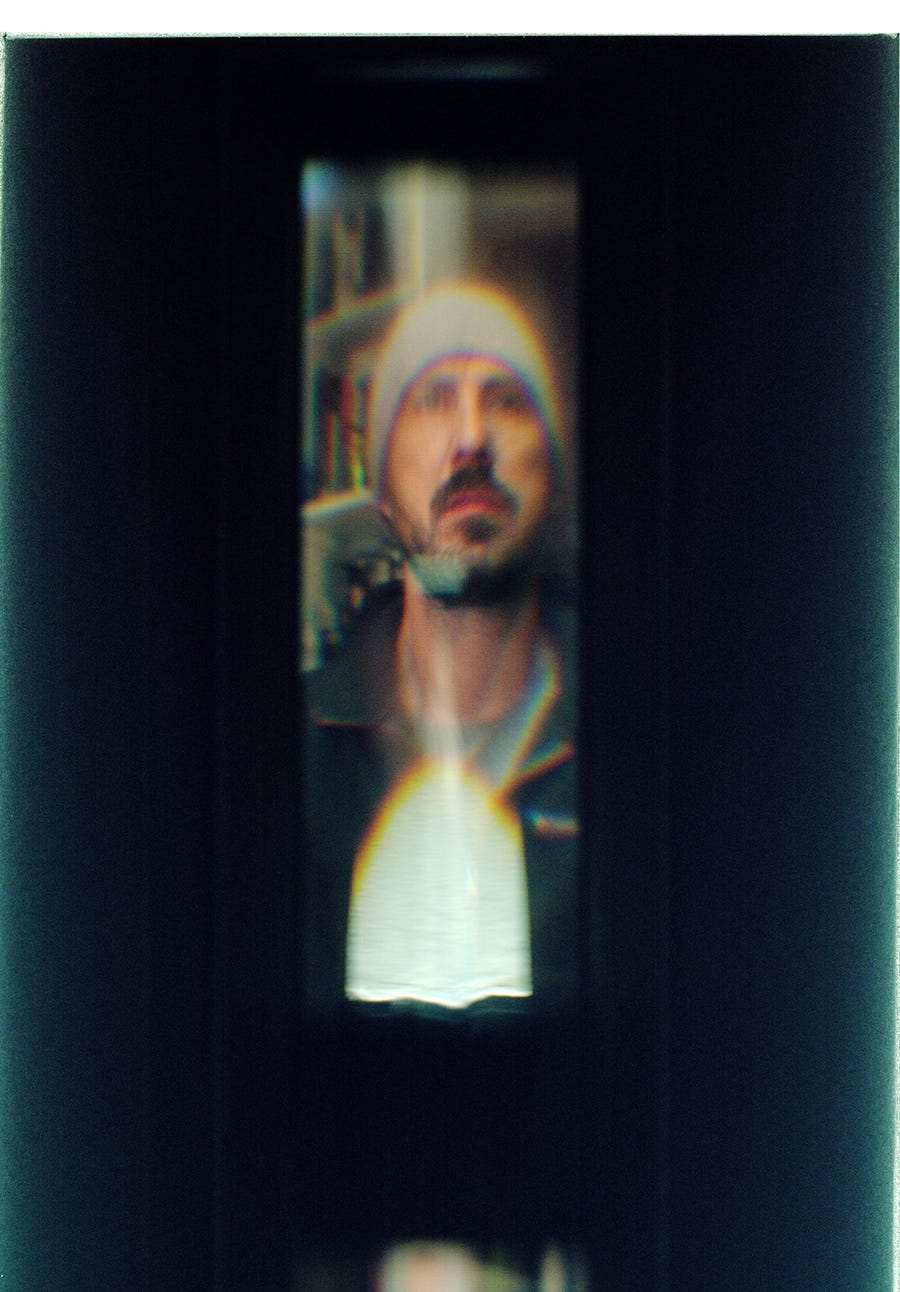
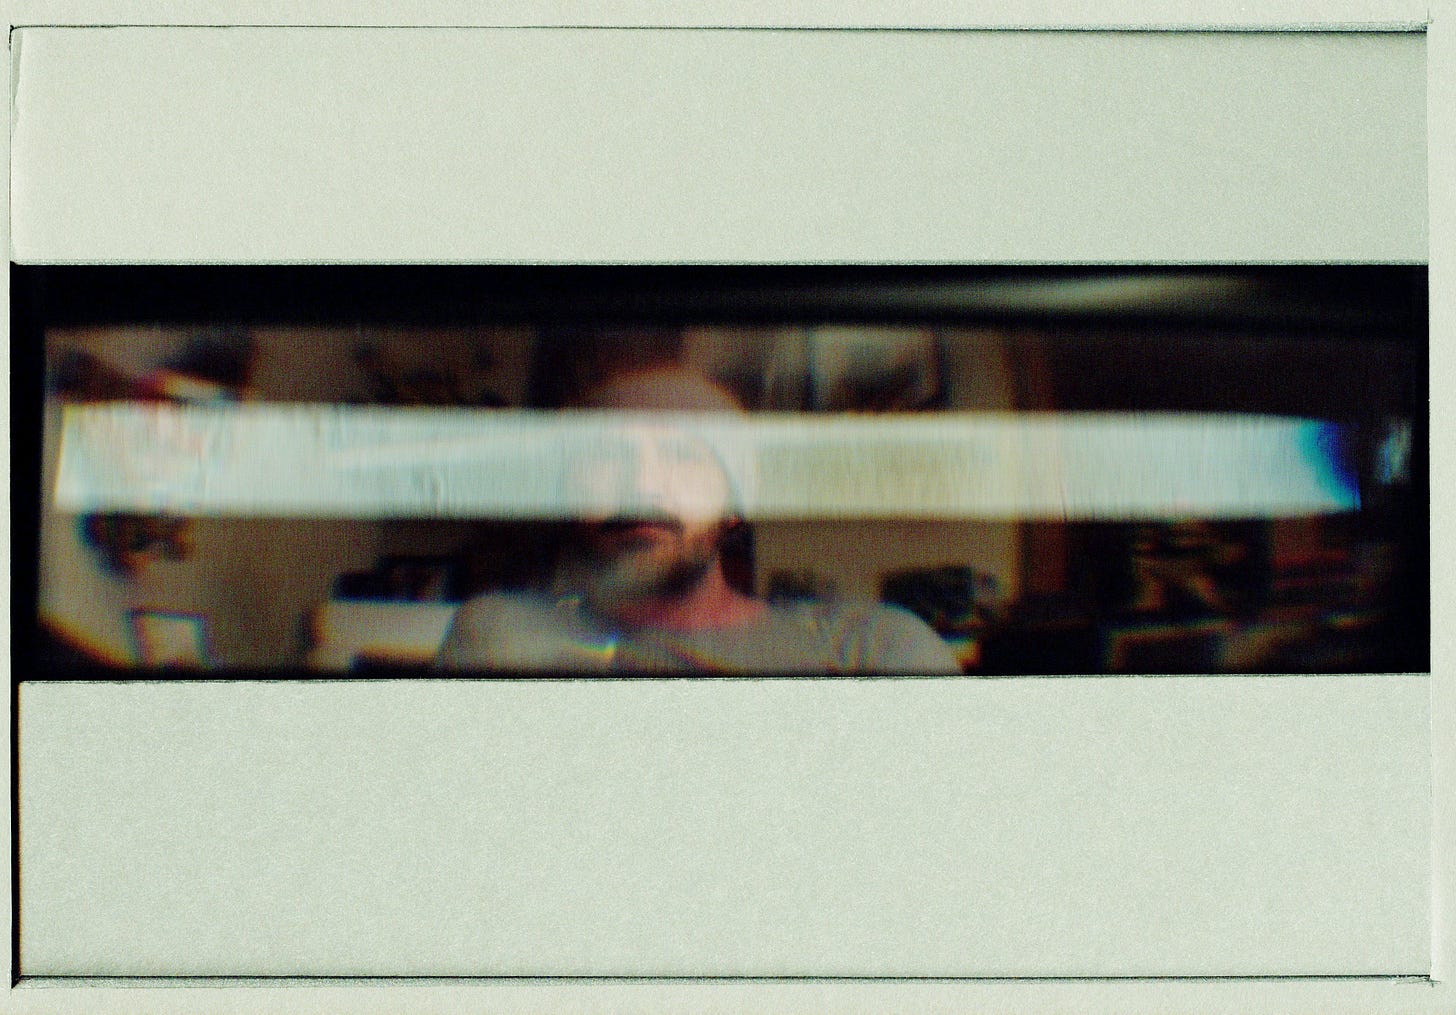
Unfortunately, this prototype failed because with the scanner on its side it forces the motor to struggle to pull the sensor up and down. It worked, sort of, but every few scans the motor would lock up. The next prototype fixes this problem. This prototype wasn’t a complete failure, however, because I learned several things. Below is one of my first successful image after around 100 throwaway attempts.
Several interesting things can be seen here. First is that the entire scan bed isn’t getting an image. Second, there is a big light streak coming from the light from the scanner reflecting off the lens. But the most exciting discovery is that this is a color image. Why is color a surprise? Let me explain…
There are only a few scanner cameras that I can find documented online and they all generate only black and white images. I am not completely sure why, but I think it is because their designs rely on ground glass to “capture” the image before scanning it.
My design removed the glass entirely and let the light coming in from the lens to hit the scanner’s sensor directly. Removing the glass eliminates dust and smudges. It also helps eliminate reflections. Here’s what it looks like with the glass. As you can see it is very dusty.
The “ground glass method” would have this dust, plus all the additional texture of the glass to compete with. The result would be an extremely grainy image because everything on the glass is captured. So get rid of it! You might think that without the glass to “capture” the image you wouldn’t get a picture. Wrong. Remember, we are trying to capture the incoming light, not the glass. The light will still hit the sensor without the glass.
Prototype 2
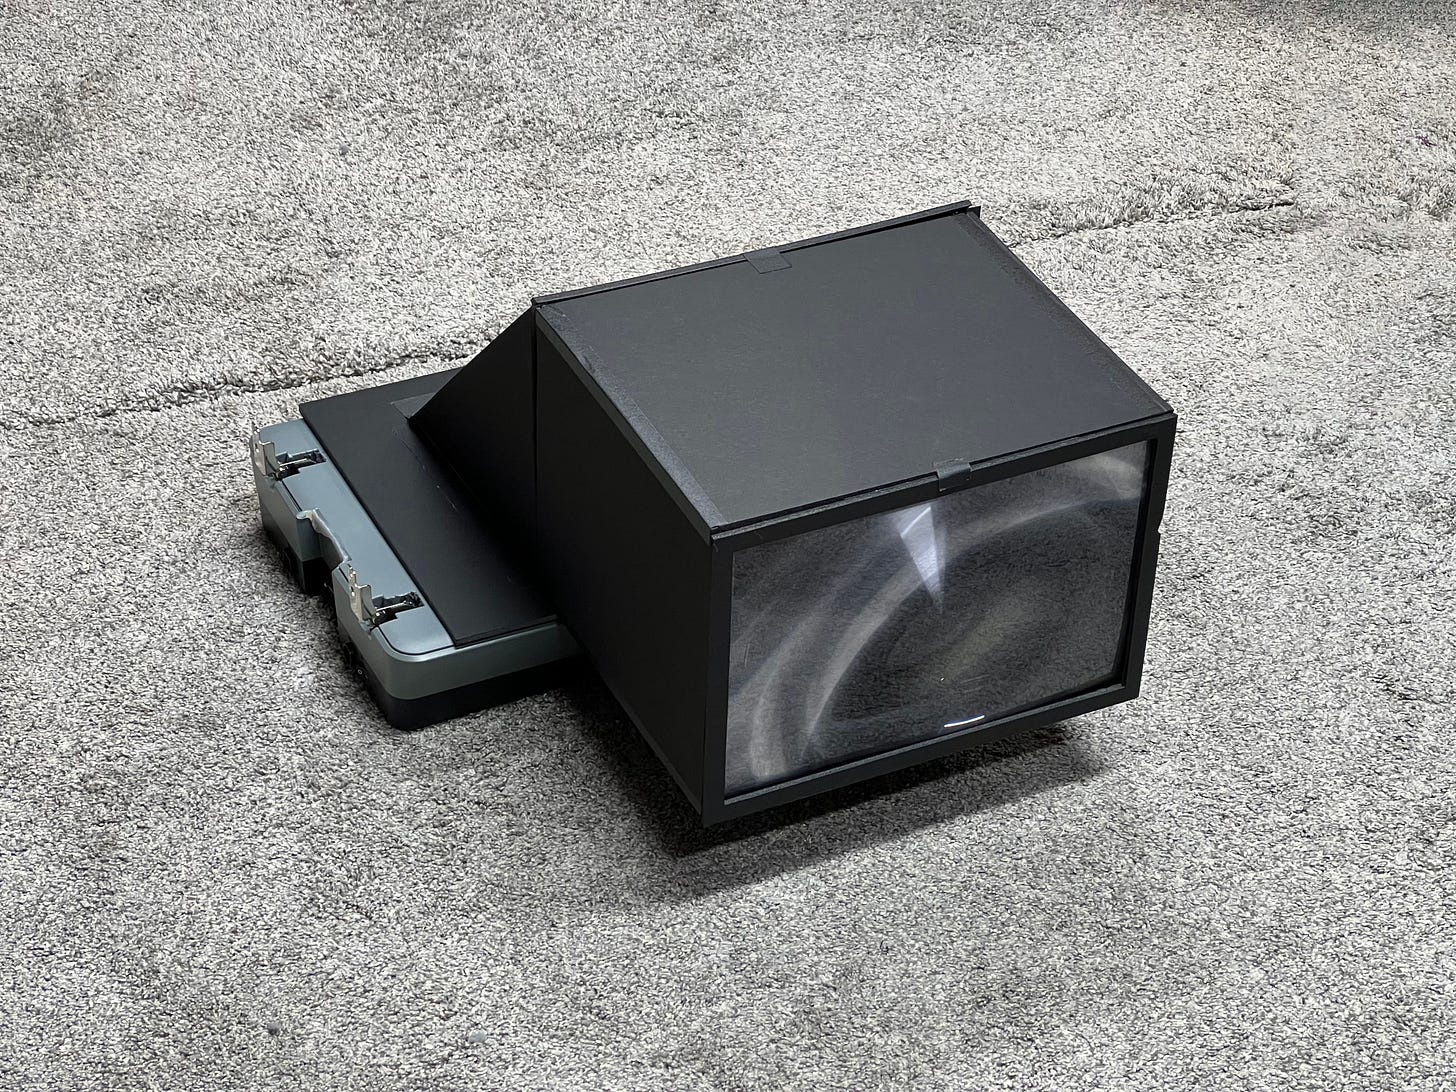
In order to keep the flatbed scanner flat I used a mirror angled at 45 degrees to reflect the image coming in through the lens. With the scanner sitting flat, I was able to start fine-tuning the image. Here’s where I ran into a new problem. Because I put the image perpendicular to the sensor, the images were very wide. Below is what an image from the second prototype looked like.
Ignore the giant light reflection in the image, I will fix that later. The bigger problem is the thin horizontal image size. I scrapped this design and turned the mirror 90 degrees so that the images would be tall and skinny instead of short and wide. It also saved me from having to rotate each image after it is scanned.
Prototype 3
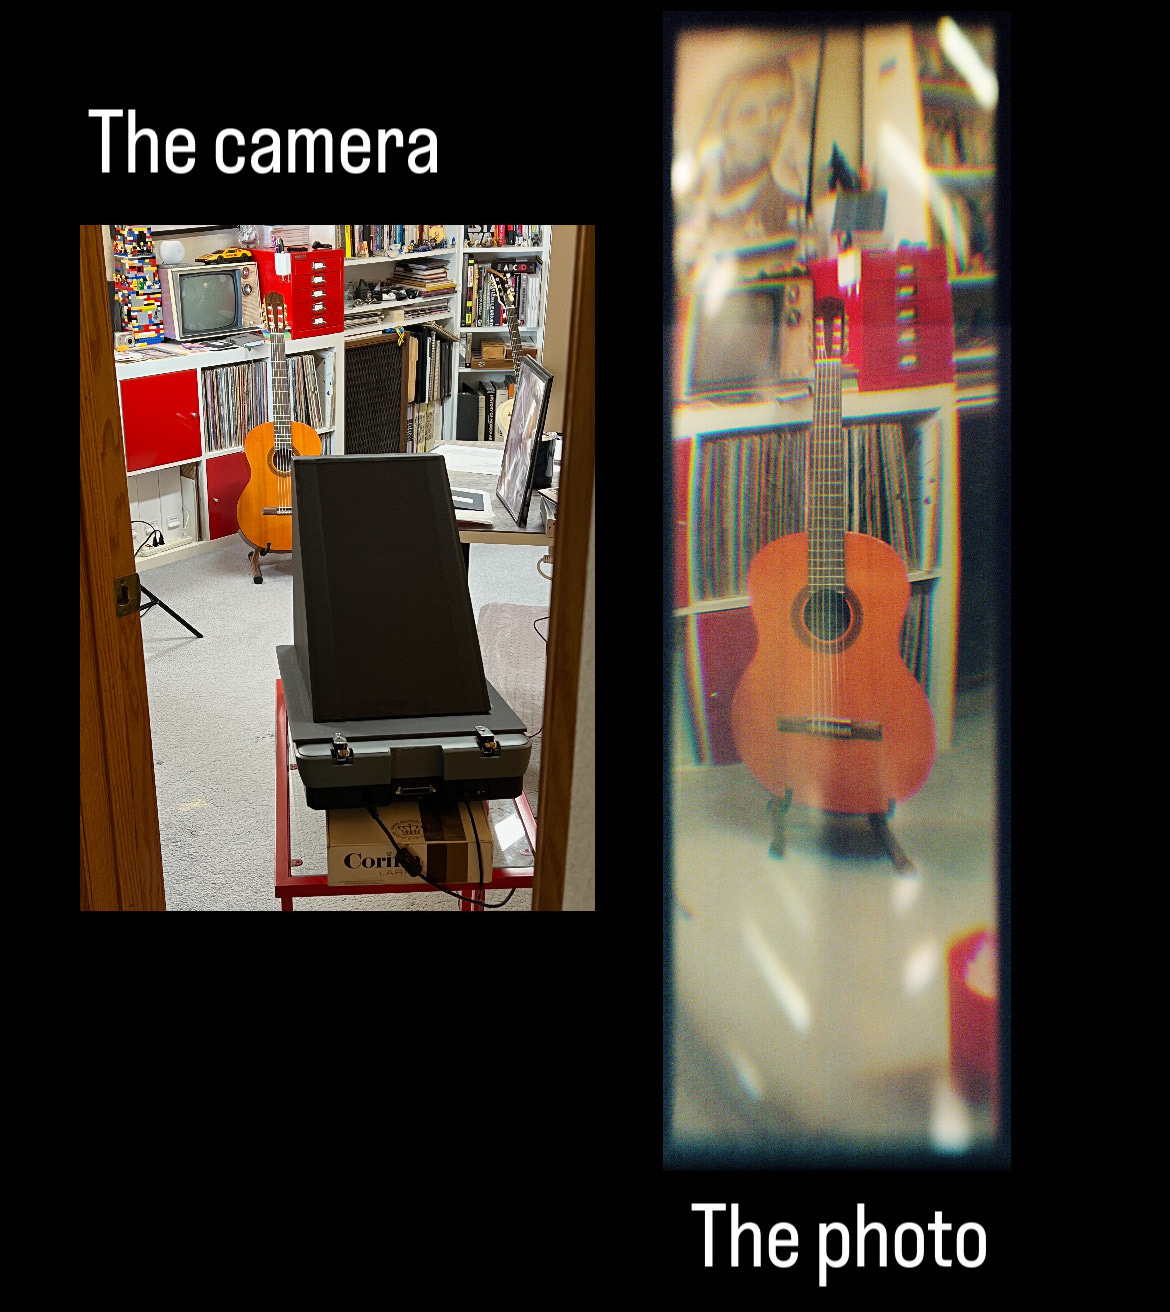
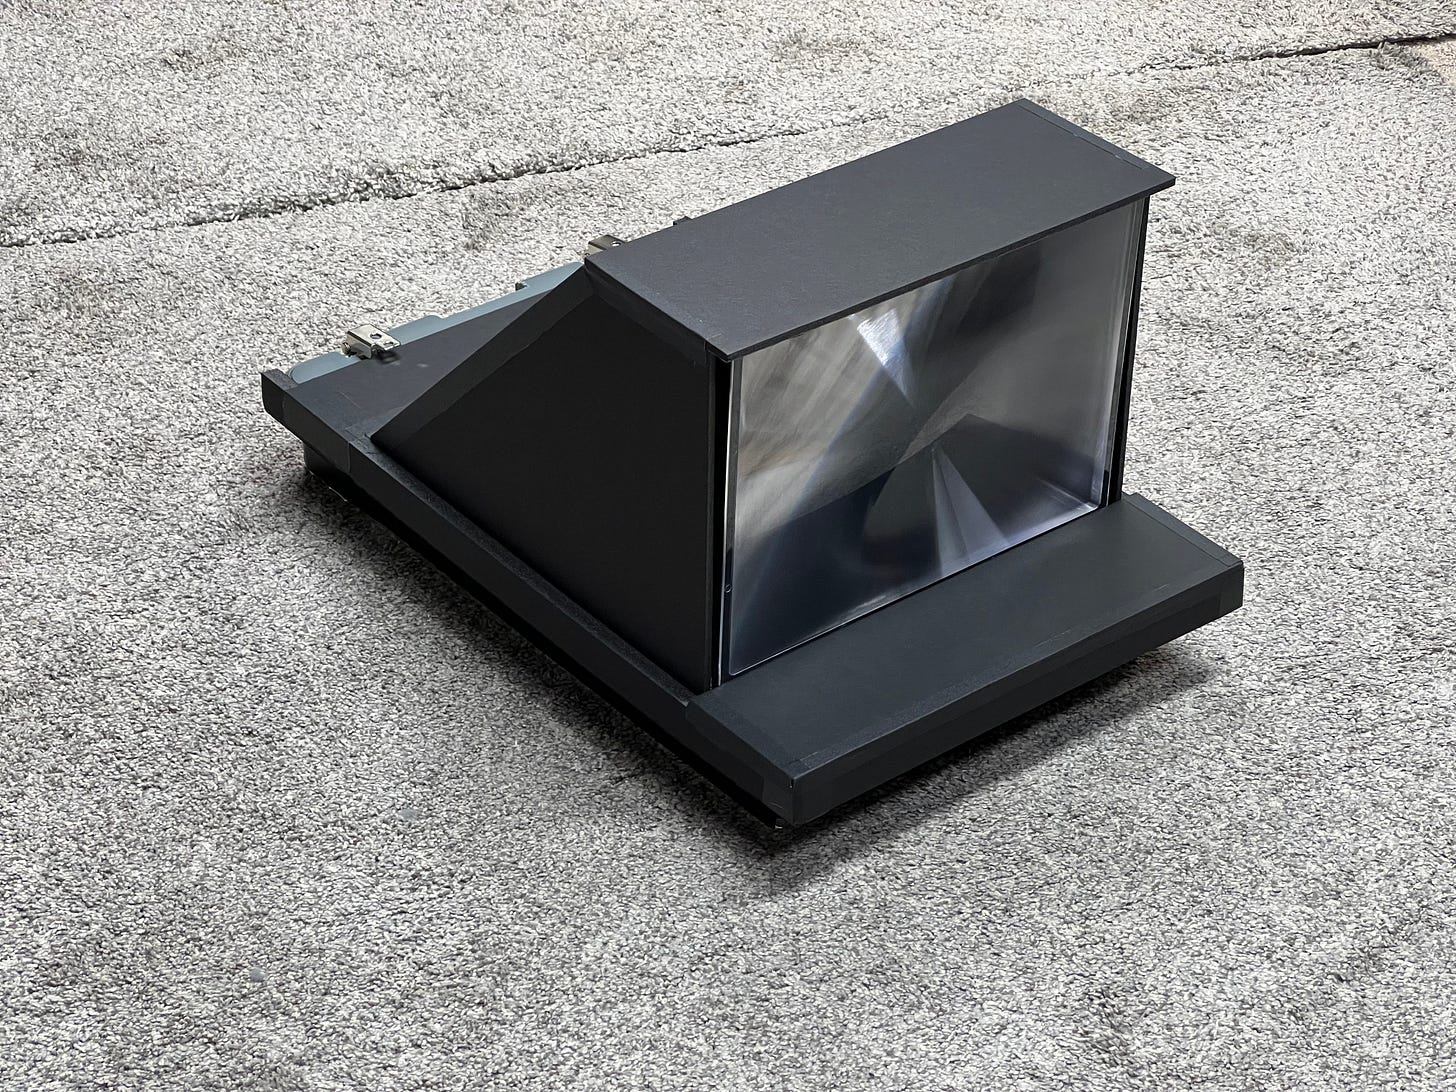
My third prototype turned the mirror so that I was getting long vertical images instead of horizontal. For those of you following me on Instagram, you might have seen my compilation of hundreds of selfies as I tested this prototype. BTW, you should follow me if you don’t already. That’s where I post my art and I also post stories showing in-progress experiments. Below is what the camera setup looks like.
Notice how far away the camera is from the subject. It’s about 8 feet. A downside of this camera is that the focus area is very shallow. It can be adjusted, however. By moving the lens closer and farther from the scanner, the focus changes inversely. If you undertake this project prepare to waste MANY scans just honing in on what is in focus. The longer the distance from the lens to the sensor, the closer the subject can be to the camera and still be in focus. The closest I’ve been able to get to the camera is a few feet with a distance of about 18 inches from the lens to the sensor. I know these measurements aren’t very precise, but I am a trial-and-error person.
You can also see some reflection spots, although they aren’t as bad as my example earlier. This can be minimized by covering the bulbs inside the scanner. You have to be careful, however, because there is some calibration that happens before a scan and if it doesn’t see light it will fail to start. I found this out the hard way, breaking one of the bulbs accidentally. It takes some trial and error, but eventually I found a balance that lets the lights be on enough that they register when it calibrates but doesn’t point directly at the lens so the reflection doesn’t bounce back.
Now, let’s talk about the long thin image. At least I can fit my face in the frame now, but it is still a big limitation. It sure would be nice if the image was more square.
Why isn’t the entire bed of the scanner getting an image? I thought it was because of the fresnel lens. To test this theory I turned the lens 90 degrees. It didn’t change. Strange. What was happening?
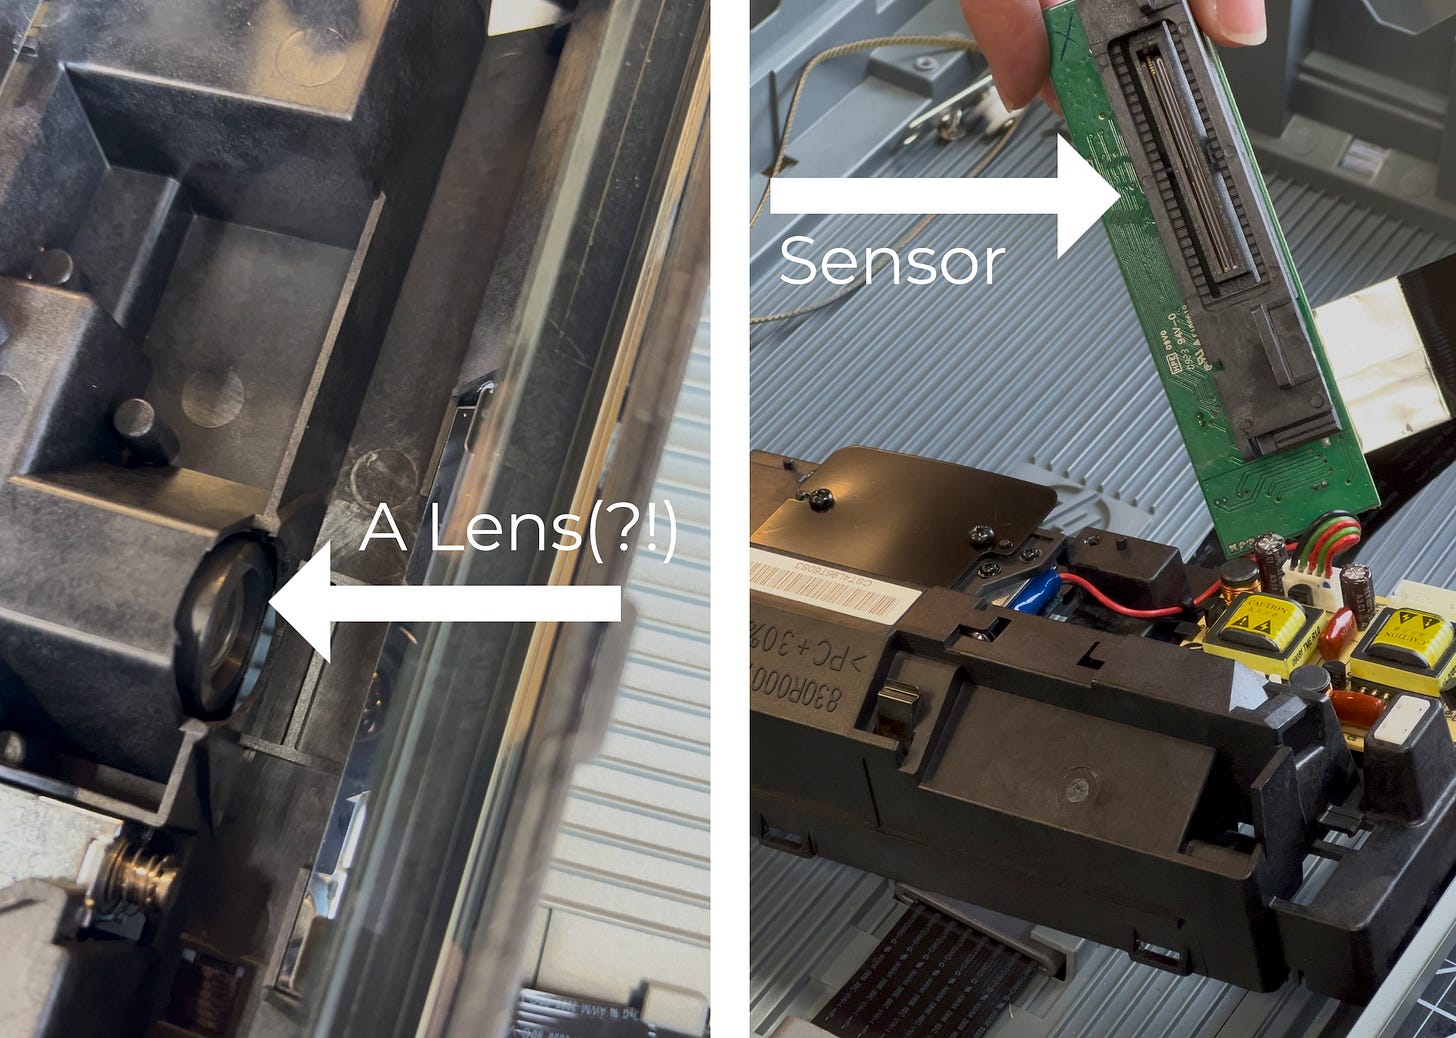
It took me a while to figure this out. It required me to take the scanner apart to see what is actually happening in there. I mistakenly thought the light was the sensor. Oh, no. The light is just a light. Let’s take it apart to find the actual sensor...
Below the glass is a mirror. Pointed at this mirror is a lens. Behind the lens is the sensor. Unlike the sensor in your camera which has both a large length and width, this sensor is 1 pixel tall and many pixels wide. This makes sense because that “1px line” is moving as the scan slides down the rail. But notice how it is smaller than the width of the glass? That’s why the lens is there. It takes the wide light and narrows it down and focuses on the smaller sensor. My mental model was of a straight projection of the image from the glass up. It’s actually a cone. In other words, the farther away from the sensor we go, the bigger the lens needs to be. The wide angle of the lens was allowing it to see the sides of my box, hence the black borders on the right/left of the image.
So how do we make our image wider? Well, here is where we run into some physical limitations. Yes, they make bigger fresnel lenses, but in order to prevent the already large camera from growing to a ridiculous size, I decided to maximize the image size by increasing the width of my mirror to the edge of the scanner. That brings us to the final(?) prototype.
Prototype 4 (The Final Design)
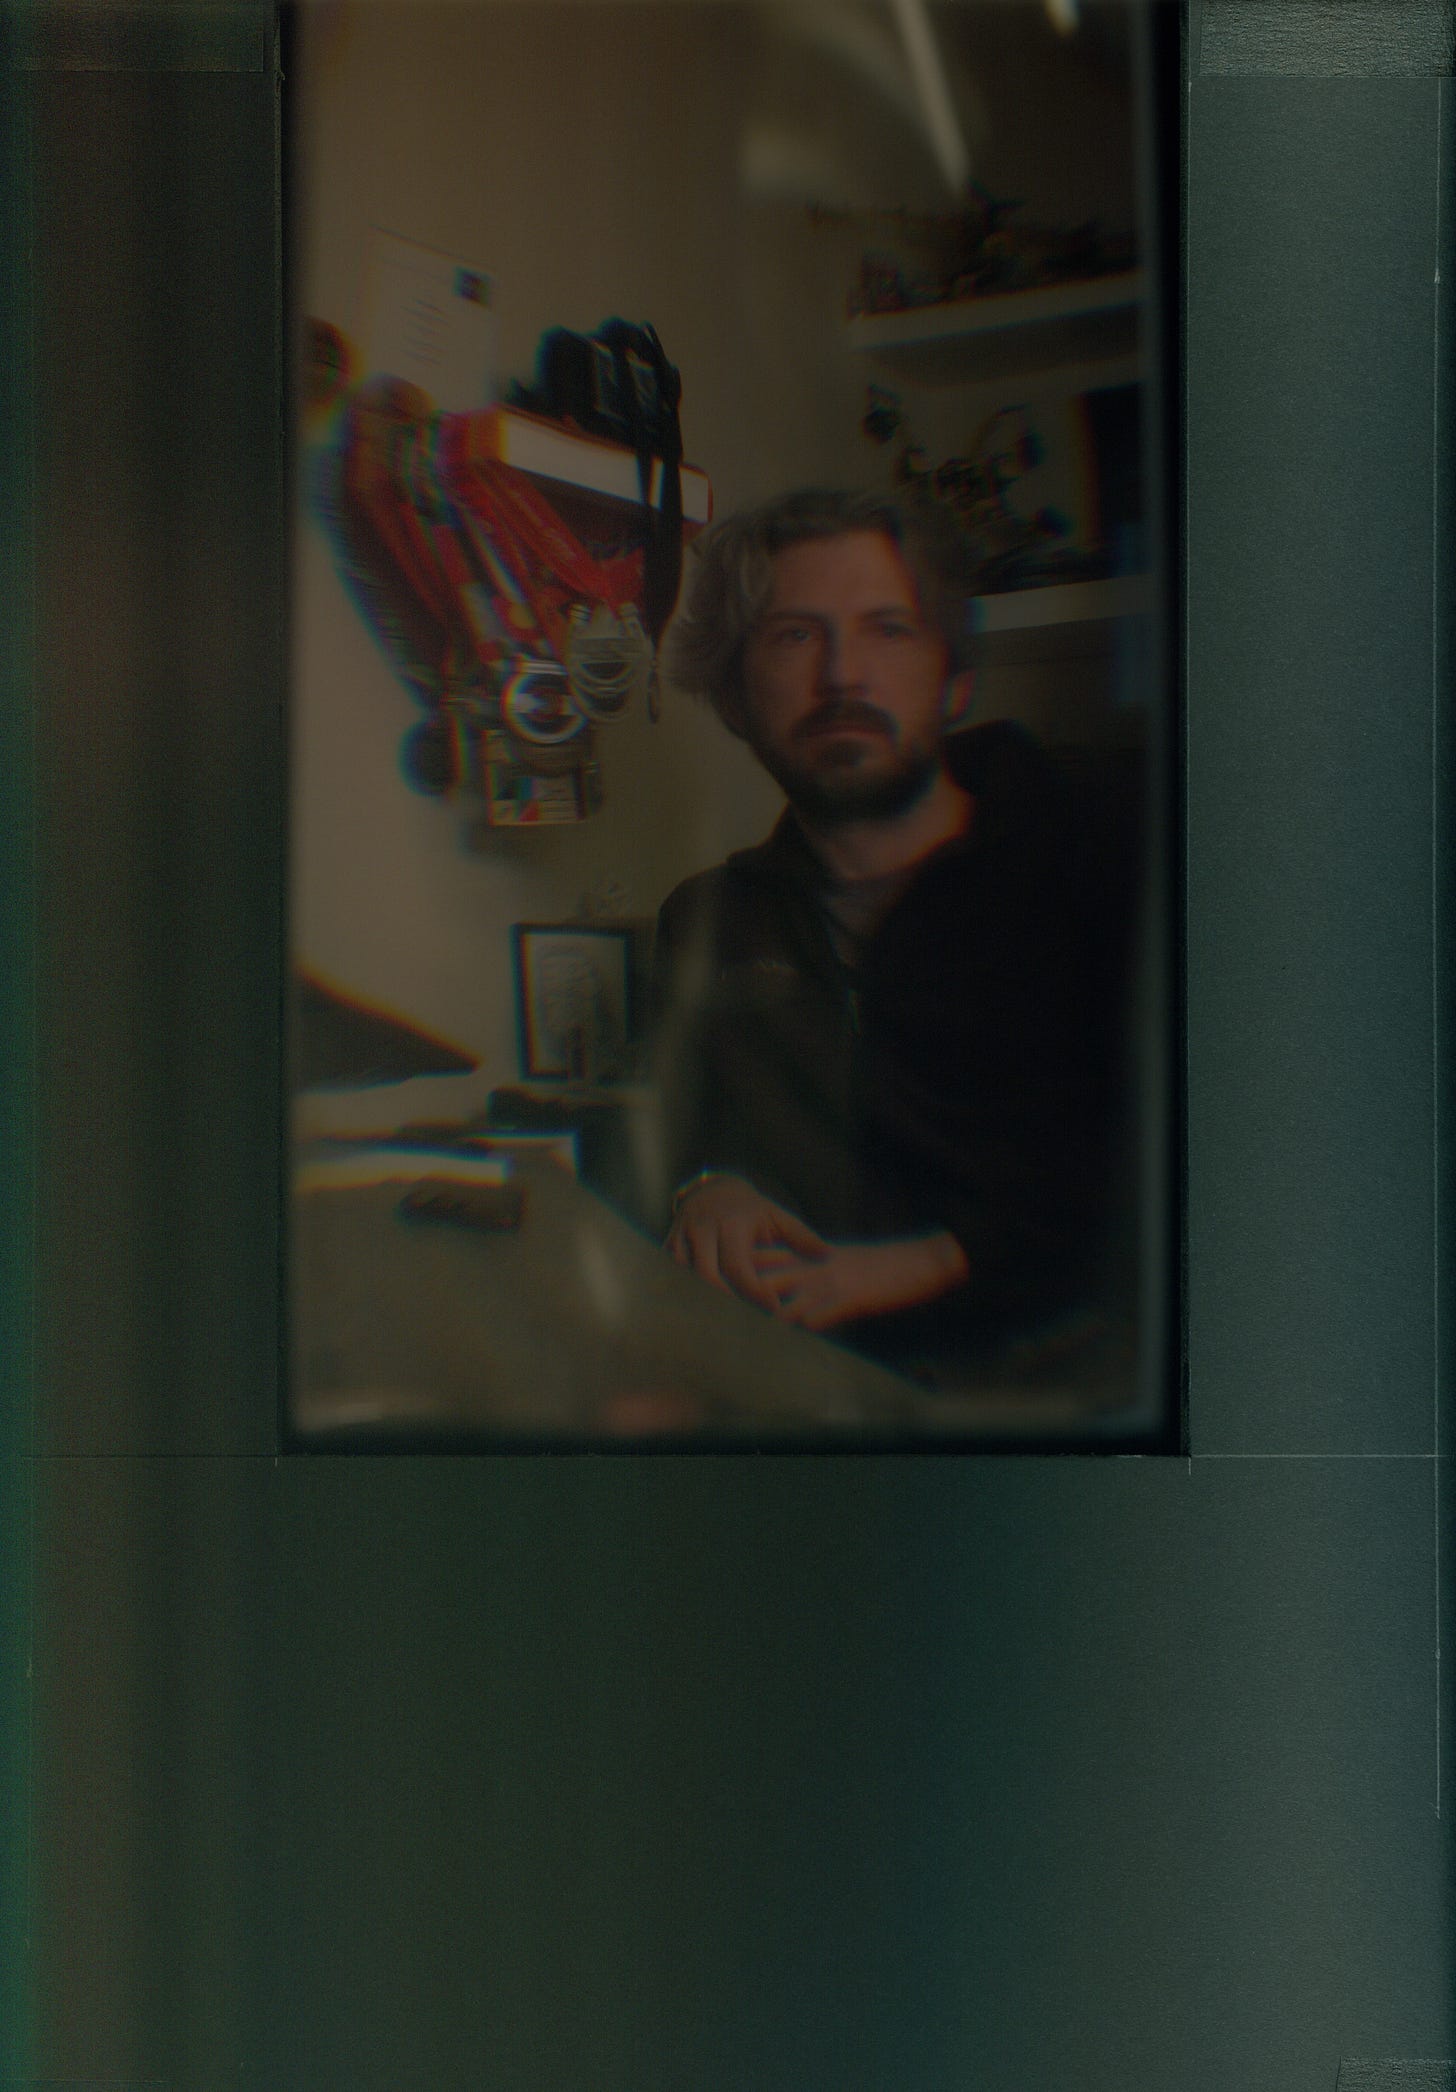
Using a wider mirror (20in x 20in) and turning the fresnel lens horizontally allowed me to increase the image capture dimensions from 3 x 11in to a more acceptable 5.3x8.5. Below is a raw scan so you can see how the image gets cropped. I am also not brightening this one so you can see it unedited. This was taken in a pretty bright room, by the way.
Now I can talk about how to control how light or dark the image is. You can’t. Unlike a normal camera that has an aperture that gets bigger or smaller to control the light we just have a wide open lens letting as much light is as possible all the time.
The sensor in a scanner is not very sensitive. It requires lots of light before it can “see” anything. That’s why if you’ve ever opened a scanner mid-scan you see that bright bulb that you can barely look at directly. Compare that to how much light comes in from the fresnel lens. It’s much less. That’s why the image above is dark. I haven’t taken the scanner outside to take a picture in direct sunlight, but my guess is this might get close to a perfect exposure.
But not being able to control the light is less of a problem than you might suspect. Why? Because the scanner is actually capturing the light three times. Once for Red, once for Green, and once for Blue. You actually have 3x the data to play with making it very forgiving. Digital cameras don’t work that way, they interpolate the sensor data to assign 3 RGB values for each pixel. So while pushing the exposure of an image this dark on a digital camera would be problematic, you can push the scanner’s levels much further.
Below is a comparison of the full color image and the three color channels. If your end goal is black and white, you can see that you have plenty of color data to play with to find your preferred style. one thing that surprises me is that the blue channel is more “grainy” than the red and green.
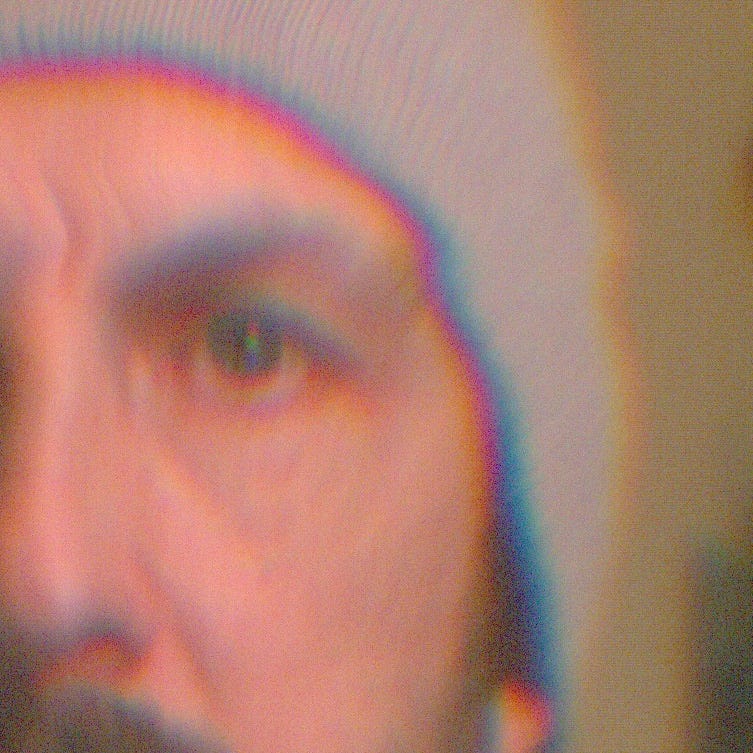
A brief segue on color channels. With separate sensors for red, green, and blue they can’t occupy the same space. So I believe each channel has its own row, each slightly behind the other. There is probably some software trick that bumps the color channels back into alignment. It is unnoticeable in a document scan. However, when the light is coming in from longer distances and different directions, this mis-alignment of RGB becomes visible. Look at the zoomed in image below and you will see what I am talking about:
I suppose I should caveat my theory with a thought that there’s a chance this is a by-product of the fresnel lens. Perhaps the plastic and the grooved nature of the lens design is what is causing the color shifts. To test this I tried a “traditional” glass lens instead of the fresnel lens. You can see in the image below that the color halo effect is still present. You can also see the circular shape that results from a different lens type.
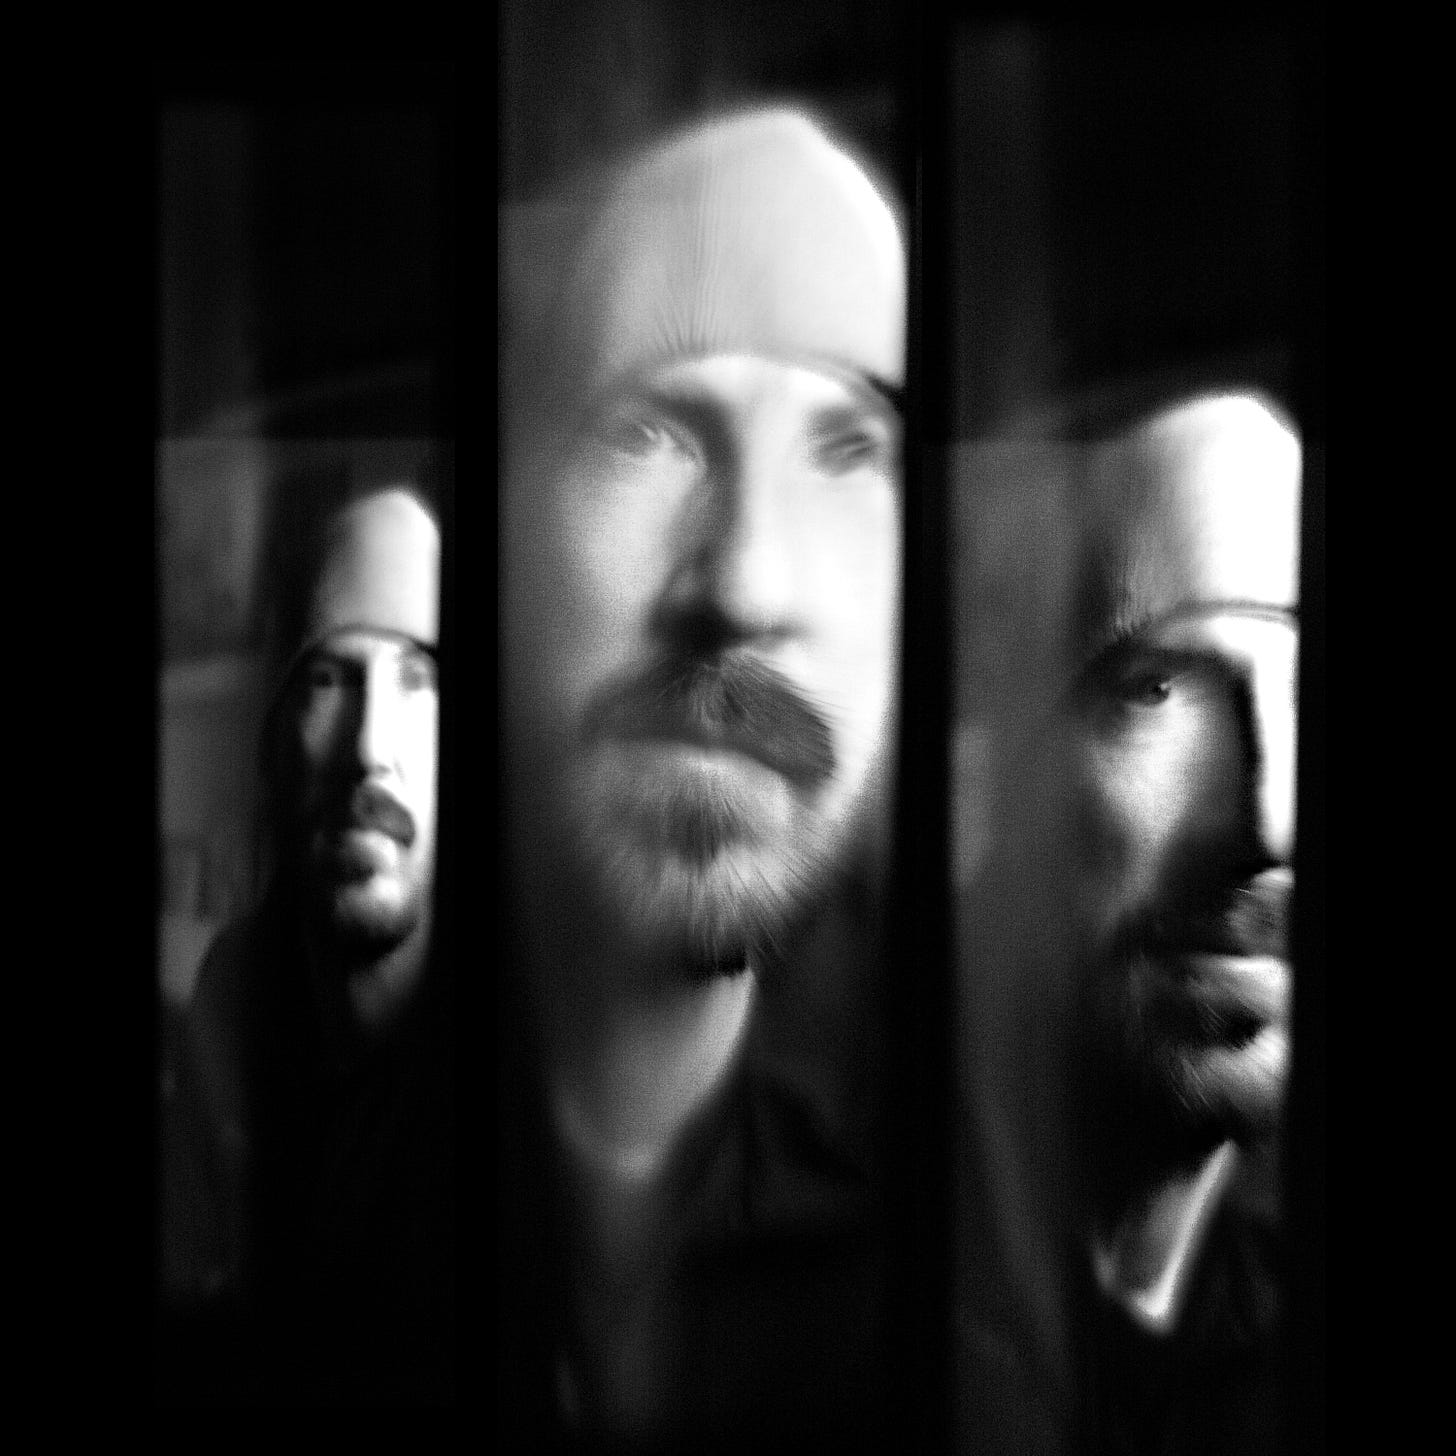
Personally, I really like the unexpected color shifts that are happening with this camera. Traditional camera mentality is that anything that distorts an image is a flaw, but I reject that idea. I’m not a camera purist, obviously, otherwise I wouldn’t be making experimental cameras in the first place. My point is that the “flaws” of the scanner camera are a feature not a bug. Embrace the constraints.
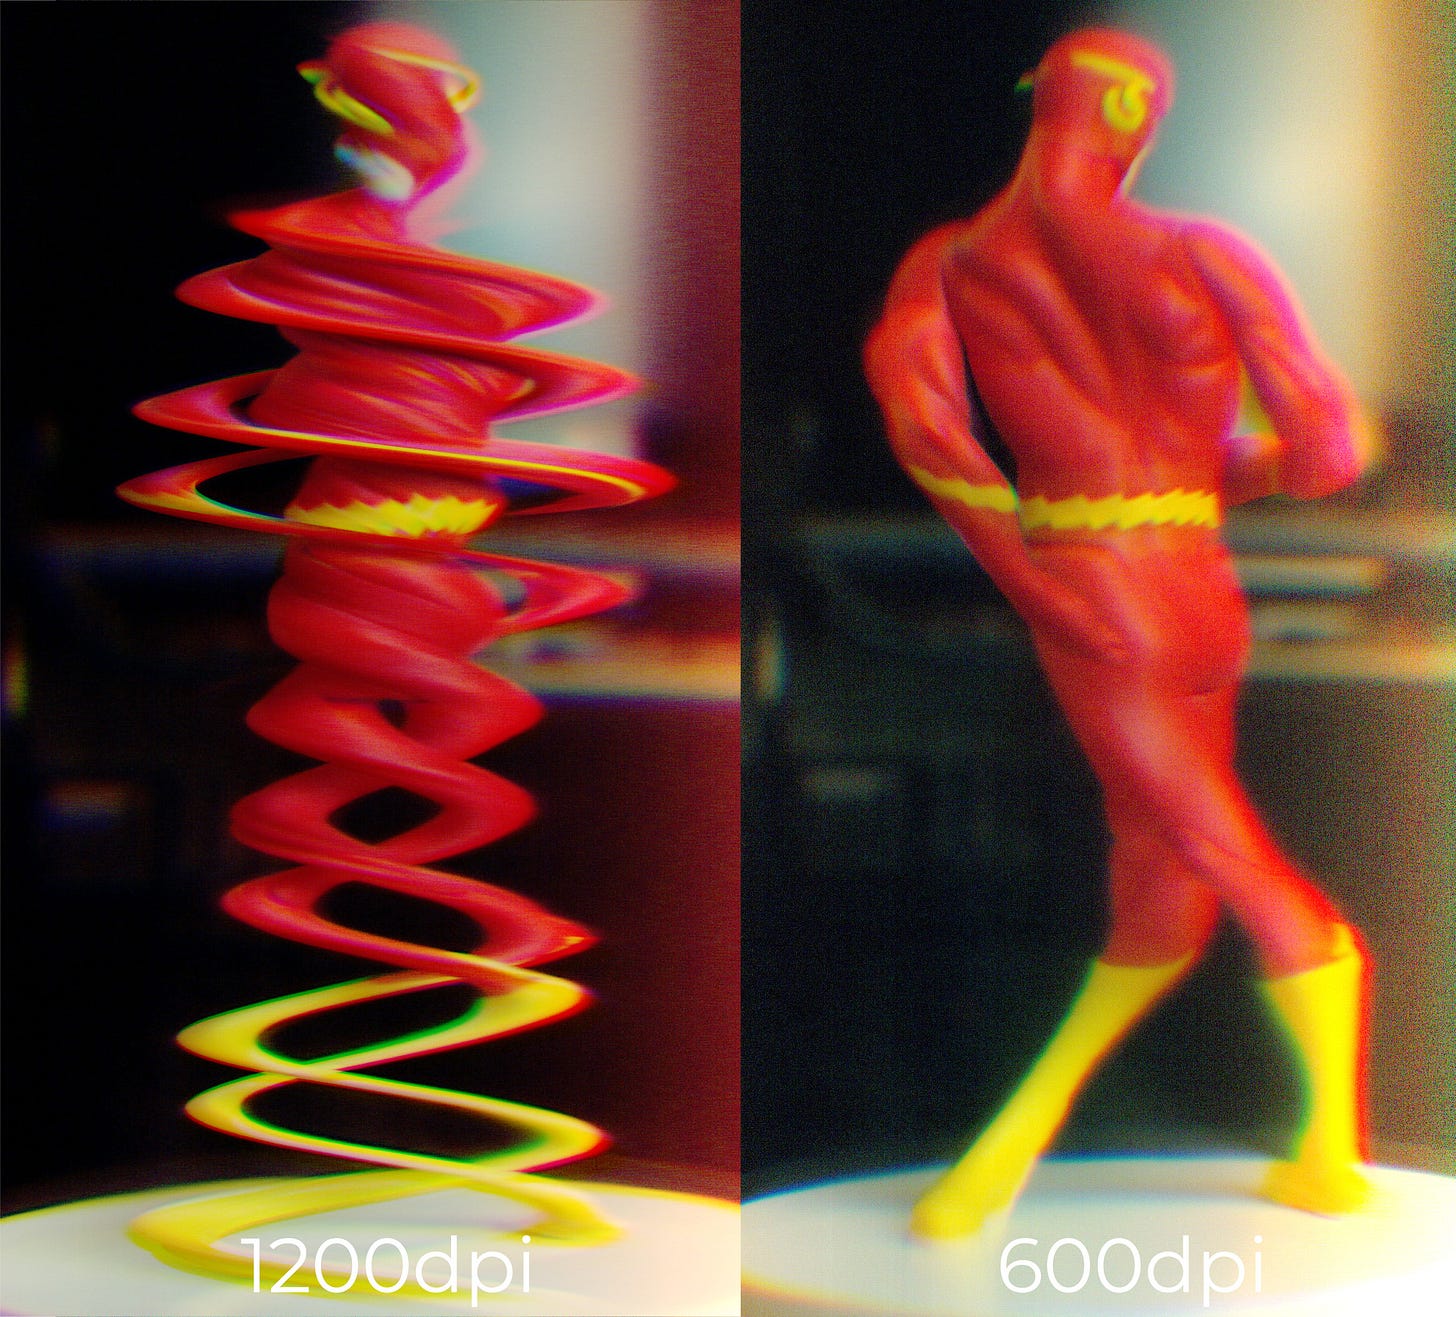
Now let’s talk about resolution. I’ve settled on 600dpi as the best balance between time and quality. Jumping up to 1200dpi takes a couple minutes where 600dpi is less than 20 seconds. This gives me an image that is about 10in x 18in at 300dpi. Plenty for almost any use. The other argument against more resolution is that this is a plastic lens. It’s not going to be perfectly sharp. You won’t get more detail just by pumping up the resolution, you are just going to get more detail of the blur at the limits of the lens.
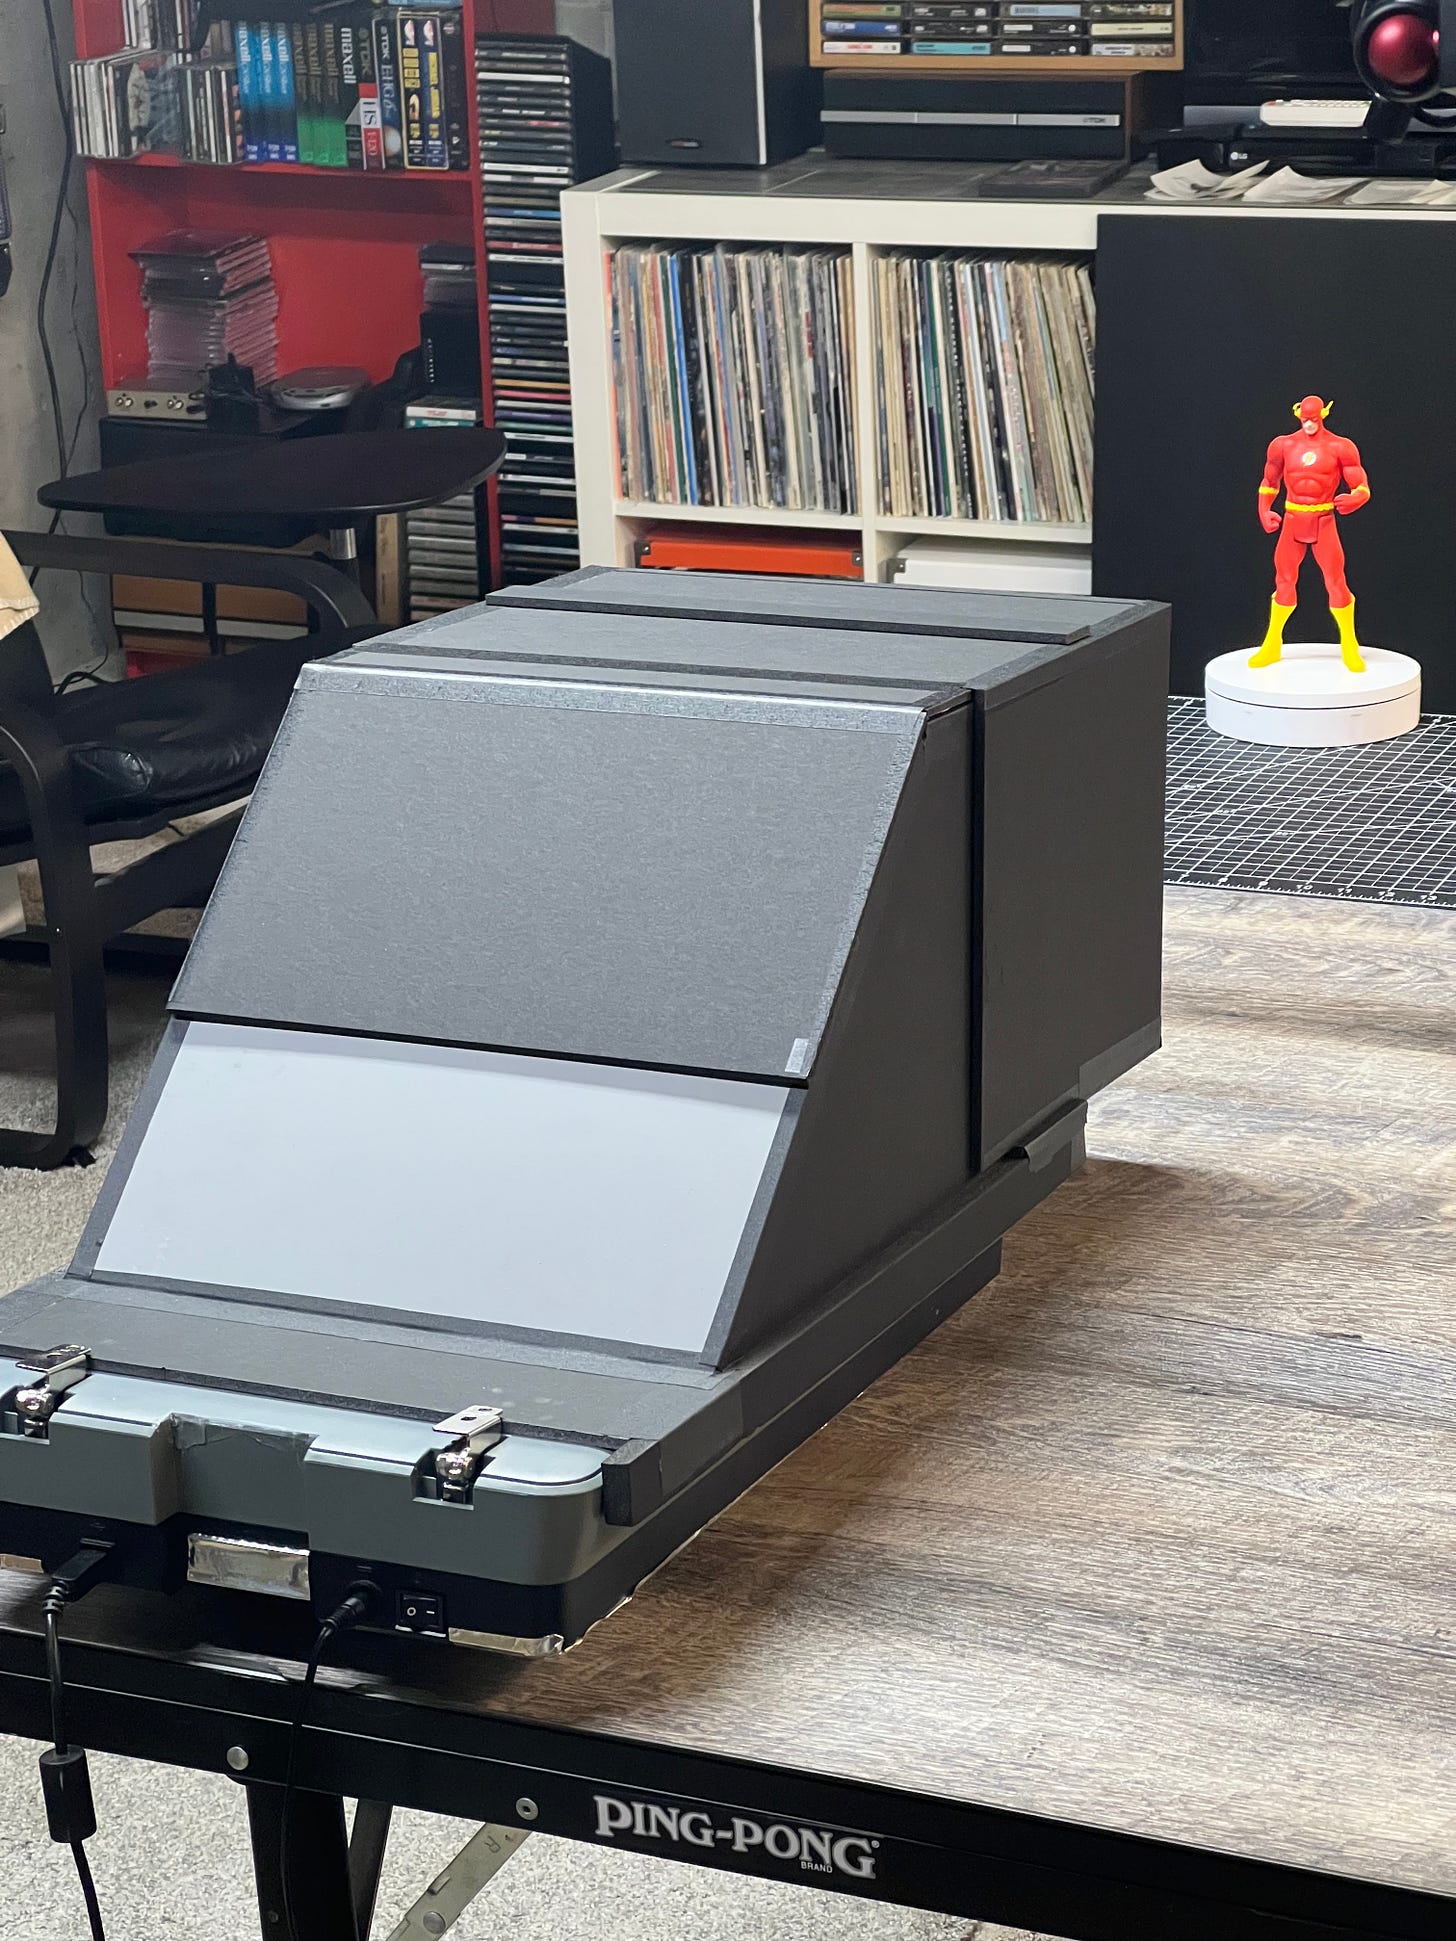
Ok, we are almost to the end of this long tutorial. Finally, can we have some fun? The Flash seems like the ideal model for a test of the time-warping capabilities of the scanner camera. Here’s the setup…
From this angle you can see 3 thin slits at the top of the box. This is where I insert the lens. It’s not a perfect solution, but it easily lets me move the lens closer or farther from the sensor. Think of it as the “zoom” control of the lens. In this setup my lens is in the second “slot.”
I have The Flash standing on a rotating stand. It spins as the scanner moves. The result is that The Flash appears to bend. The higher the resolution, the slower the scanner moves. That means if you want lots of movement, scan at 1200 dpi. Less movement, scan faster at 300 or 600 dpi.
The video above is made by taking many photos of The Flash and stitching them together, each image becoming a frame in the animation. It’s a pretty interesting effect isn’t it? Hopefully now you can see some of the possibilities of a scanner camera and maybe you are inspired to make one of your own. What’s next?
Prototype 5?
A project like this is never really done. It lives in your head forever, and you return to it in your free time, turn it around, poke on it, and think about how you could do things differently. One thing that nags me is that inside the scanner is a lens next to the sensor. My fresnel lens is pointing at another lens before reaching the sensor. This annoys me. Is the middle lens necessary? Why not remove the middle lens and let the fresnel lens shine light directly on the sensor?
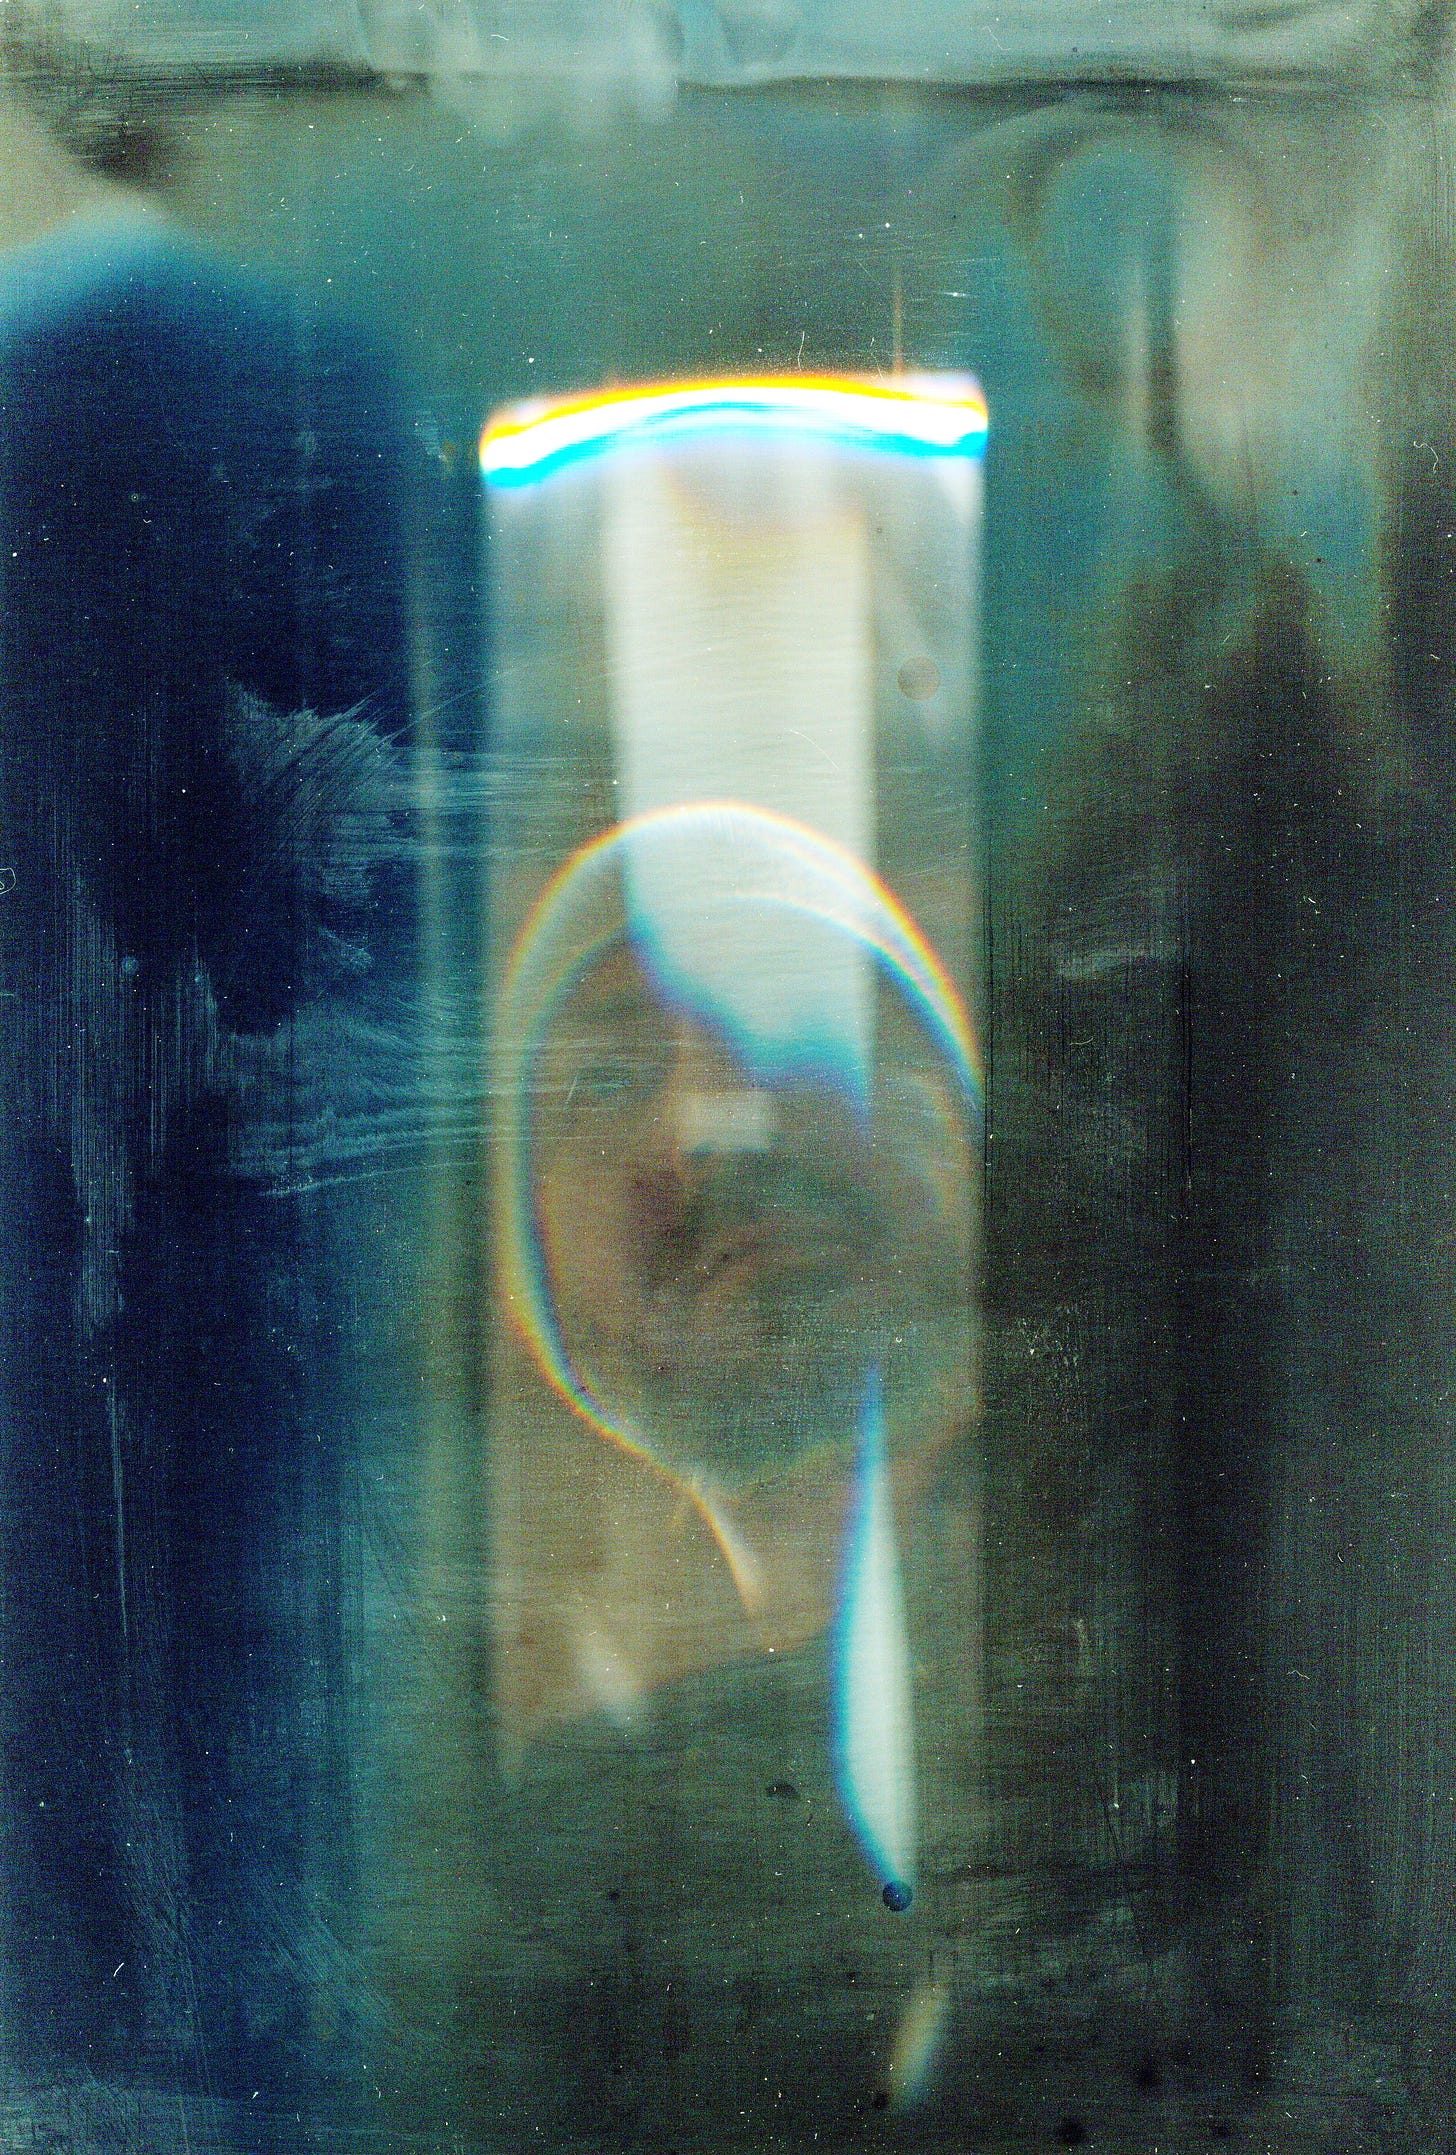
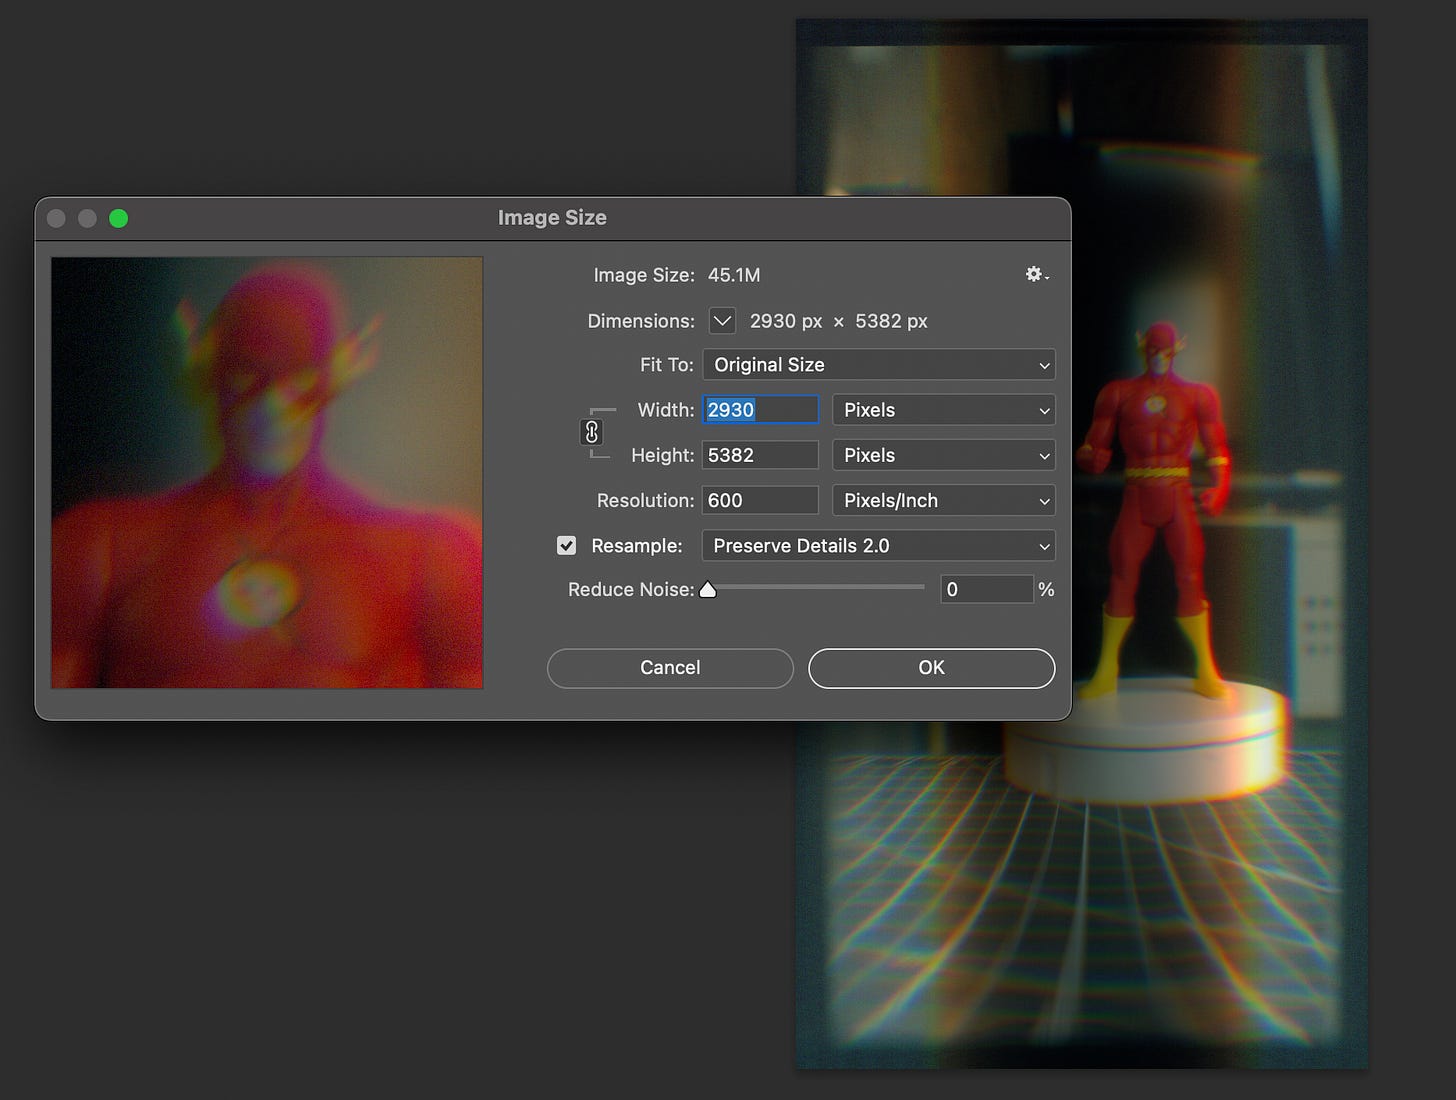
I’ve started going down this path. I have stripped everything away and uncovered the sensor. I mounted the sensor so it points outward. Below is an image from this setup…
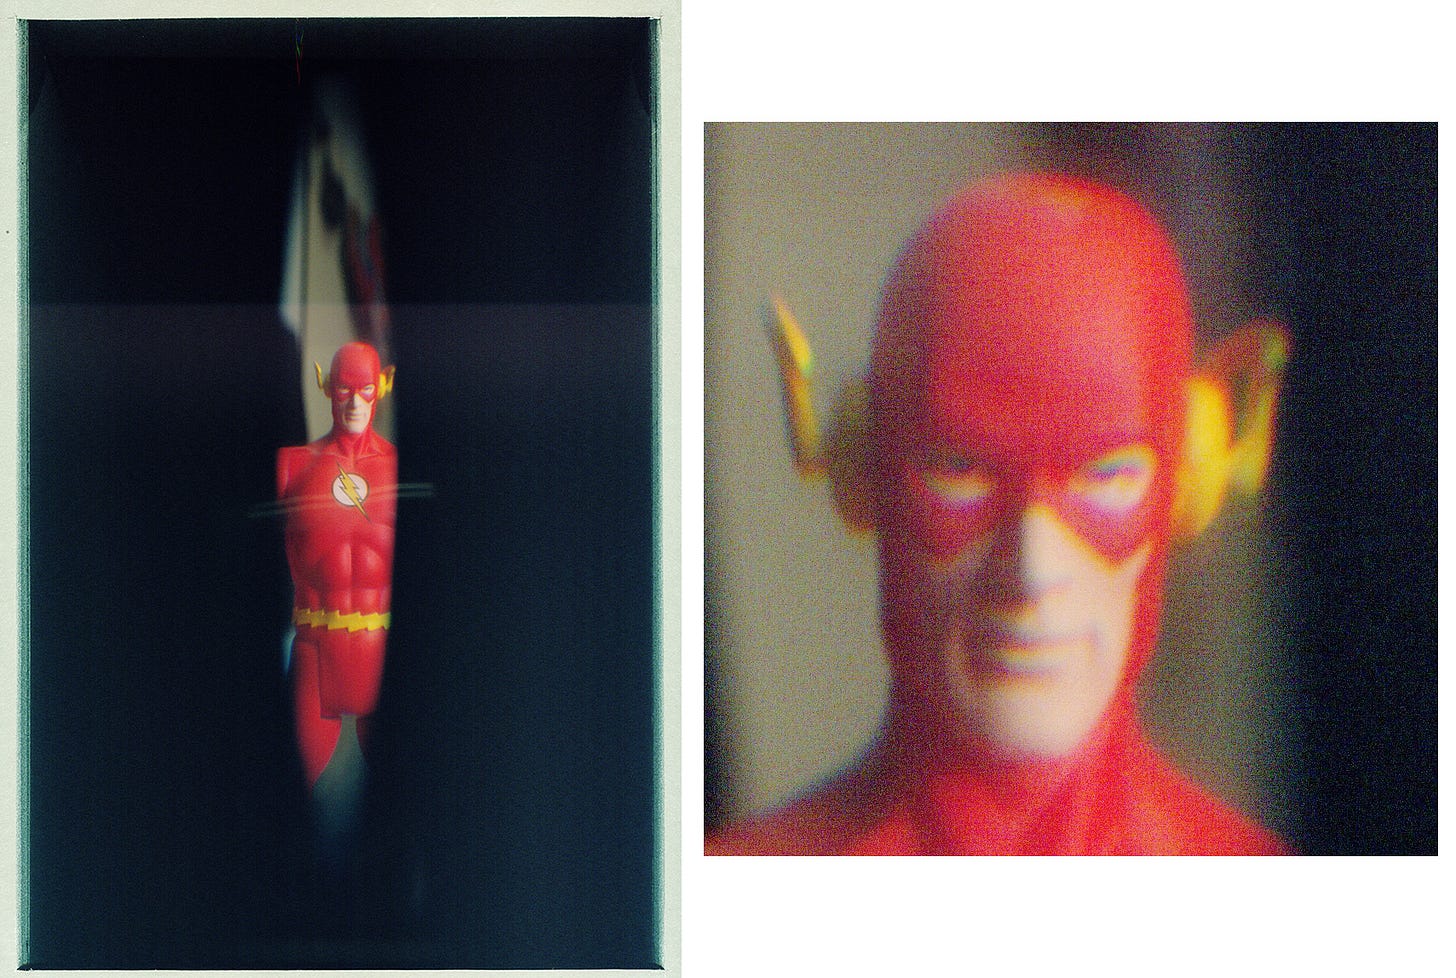
Forget the fact that this image doesn’t look photographic. Still, it’s beautiful isn’t it? I want to end this post not on an “I’ve figured everything out” note. Instead, it seems better to leave the experiment open-ended. I may or may not get this version of the scanner camera to work and that is okay. There is more to discover, many untested avenues, no single solution. That’s where I invite you to take this project and make it your own. If you do, please share your successes and failures with me and the photo community.
The thing that fascinates me about experimental camera building is that there is unique beauty that results from the fingerprints that the tools leave on their images. They might seem like they are flaws, but they aren’t. They are personality. A camera made of a scanner has more personality than any SLR and that’s what I love about it.
All the pressure for buying and selling consumer cameras points at perfect precision as the ultimate goal. More megapixels. Sharper lenses. Pocket-size. Point and shoot. We’ve achieved incredible precision and yet the result is that everyone’s photos look the same. To breathe life back into the pristine images people use digital filters and photoshop alterations to push them back to the gritty lo-fi territory where images feel closer to reality again. That’s why something as unpractical as a scanner camera justifies its existence. It’s authentic in a way that other images are incapable of matching. Thanks for your interest in my odd projects and I wish you the best.
If you made it this far and aren’t a subscriber, please join my free mailing list to receive more stories like this. Stay creative.
Your friend,
Ade




This is incredible! I love using scanners because of how the sensor moves across the glass allowing you to manipulate images in real time. You took it to another level. Thanks for sharing all the different prototypes and explaining how it all worked (or didn't). BTW your animations are wonderful. I'm not sure how I found you but I'm so glad I did!
Very nice hack! I do like the observation about digital cameras all being the same. In music production I've seen it said that a digital plugin is like we are all using the same reverb box, or synth...